I know; it's not fall. But really, isn't any time of year the right time for AIP pumpkin pie bars?
If you're a fan of pumpkin flavor, this healthy pumpkin pie bars recipe is going to become your fast favorite. It's not going to take you hours of work in the kitchen over a hot stove. And though it has two layers to it, don't let how complicated layer bars can be put you off. This AIP pumpkin bars recipe is pretty darn simple, despite the fact that AIP recipes can often seem complicated, or have a laundry list of ingredients involved.
I'm happy to say that's not the case here.
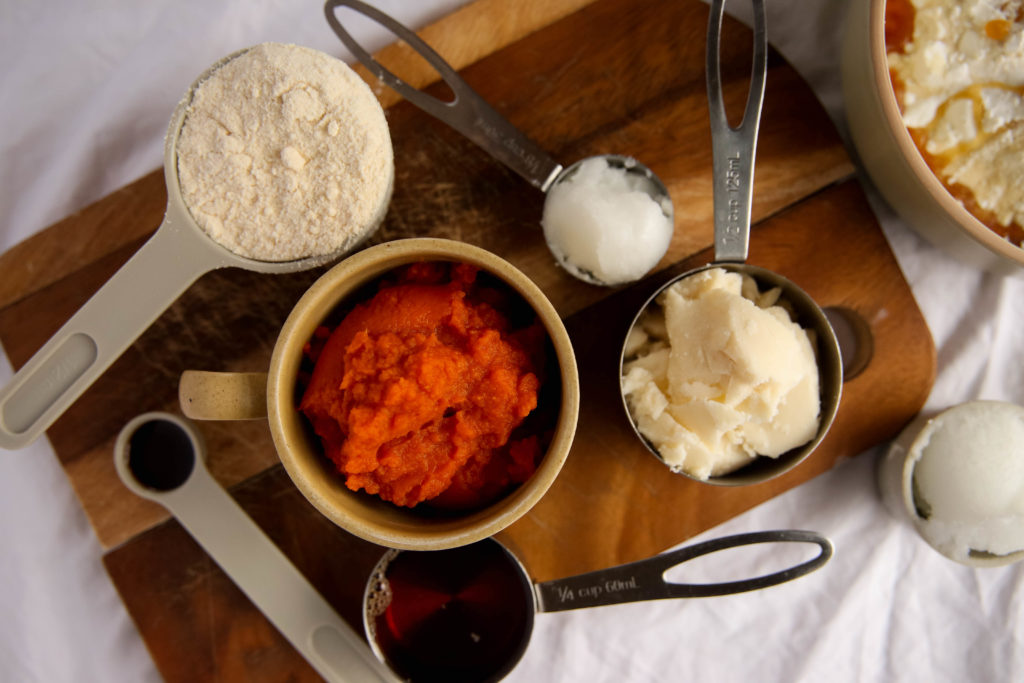
As usual, the first step to smooth the way is to gather all your ingredients. It'll mean less running around your kitchen, going from the cupboards back to the counter each step of the way.
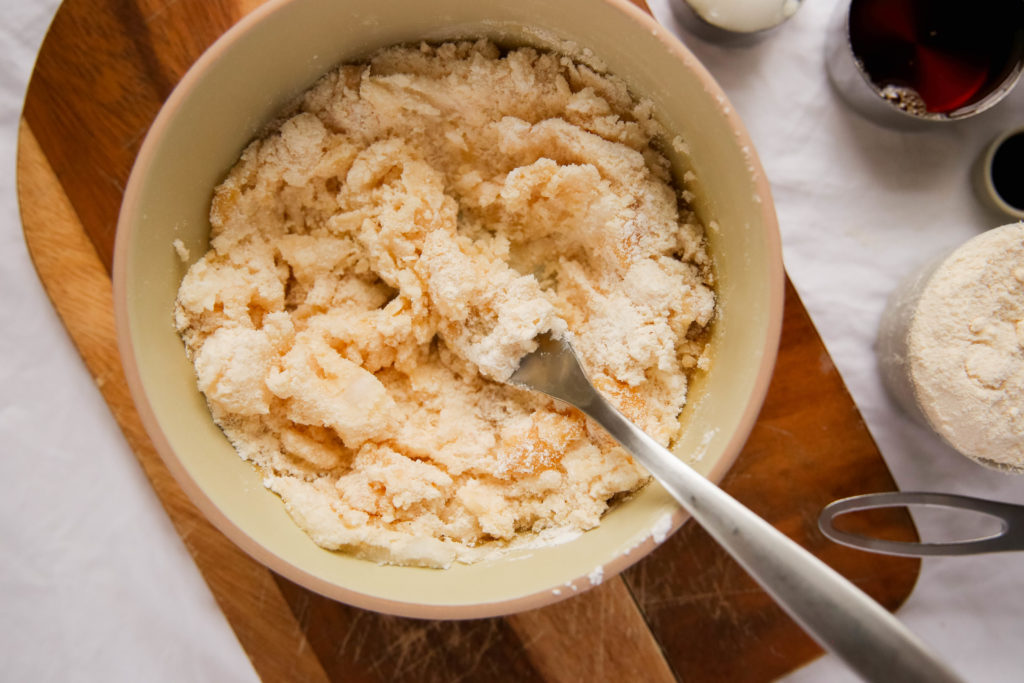
You're going to be working from two bowls here. One will be dedicated to each layer. The first bowl is going to be for your crust, and the second for your filling.
Here's your ingredient list:
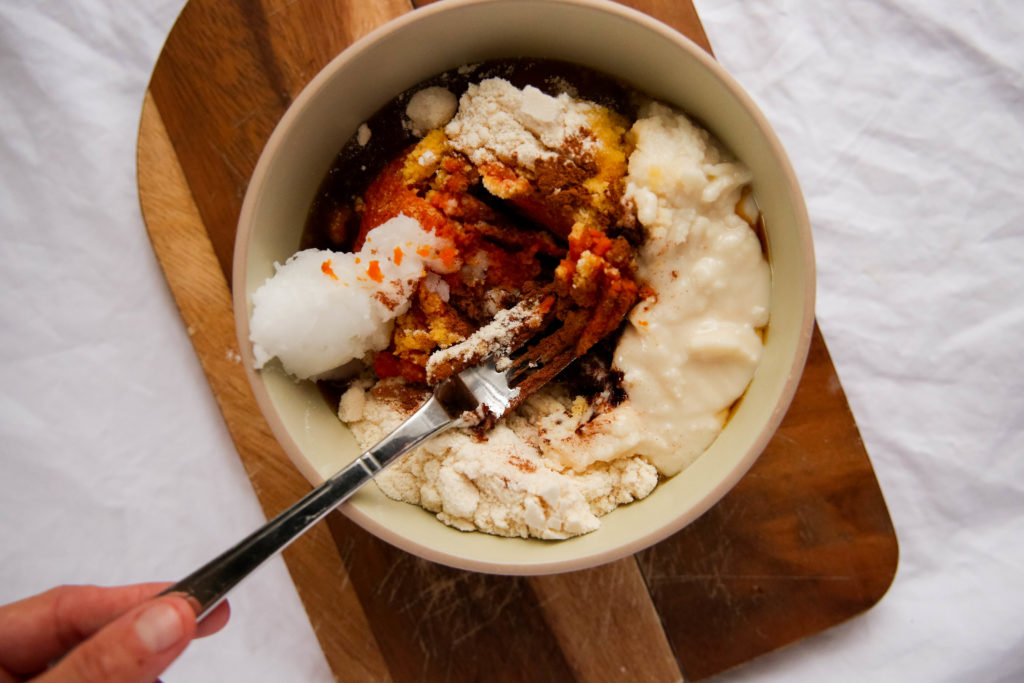
First, add all your healthy pumpkin bar crust ingredients to one of the bowls and mix until combined.
Then, go ahead and set your AIP pumpkin pie crust to the side, because you're going to get another bowl to mix up the delicious filling.
You'll combine the filling in a medium bowl, then set that one aside, too.
Now, it's time to start assembling these two tasty layers. You'll press the crust into an 8x8 baking pan that's been lined with parchment paper. Don't skip the paper, because it'll make the healthy pumpkin pie bars way easier to take out later. You'll save yourself a lot of work after the baking process is over.
Grab the bowl with the crust ingredients that you mixed up first. Press the crust into the baking pan, right on top of the parchment paper.
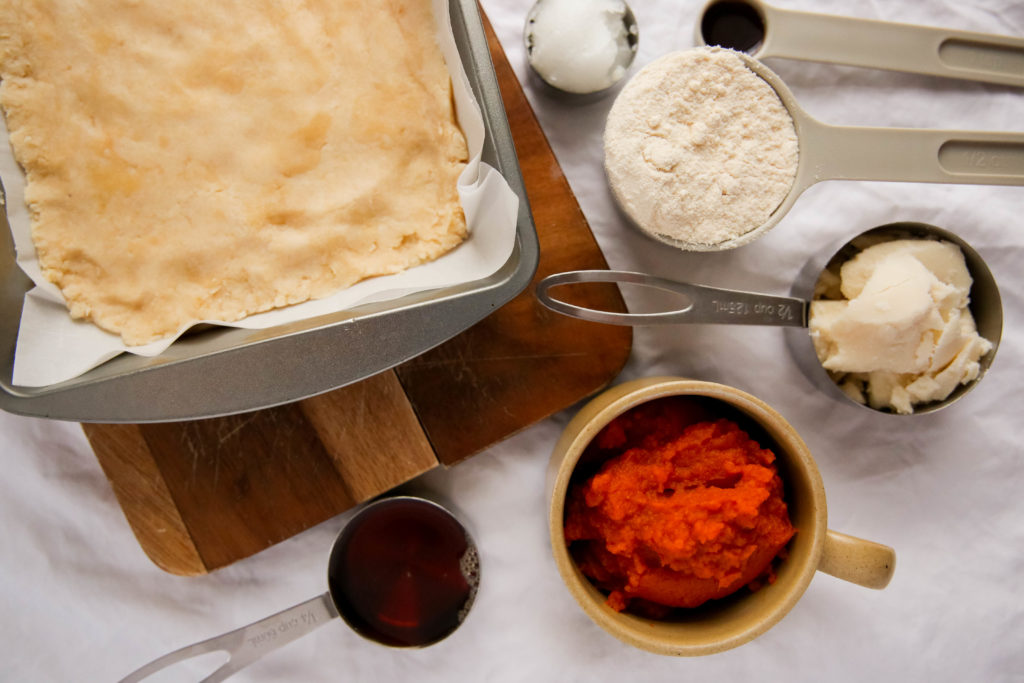
The crust layer of your AIP pumpkin pie bars is going to bake first, allowing it to set before the filling layer is added on top. So, go ahead and bake that for 8-10 minutes.
If you're a planner when it comes to recipes, you may end up mixing the crust first, then getting it in the oven and mixing up the filling ingredients while the crust bakes. It's totally up to you and what feels easiest for you when you're in the kitchen. (If you want my two cents, though, I have a great idea of what you can do while these are in the oven -- it doesn't take long and can help you feel energized and in a positive mindset. I've put a video together HERE for you to learn about it and get a quick how-to guide.)
After your crust layer has baked, you're going to grab the bowl with the filling ingredients in it.
Now, the baking part is actually done. The crust is the only part of this AIP pumpkin pie bar recipe that needs to be baked. Let it cool, then you can layer the filling on from your second mixing bowl. Smooth it out to be uniform thickness over the crust.
Finally, you're going to place the bars in the fridge or freezer. If you just can't wait to try a healthy pumpkin pie bar, then you're going to want to place it in the freezer, because it will only take 20 minutes to set, compared to 40 minutes if you use your refrigerator.
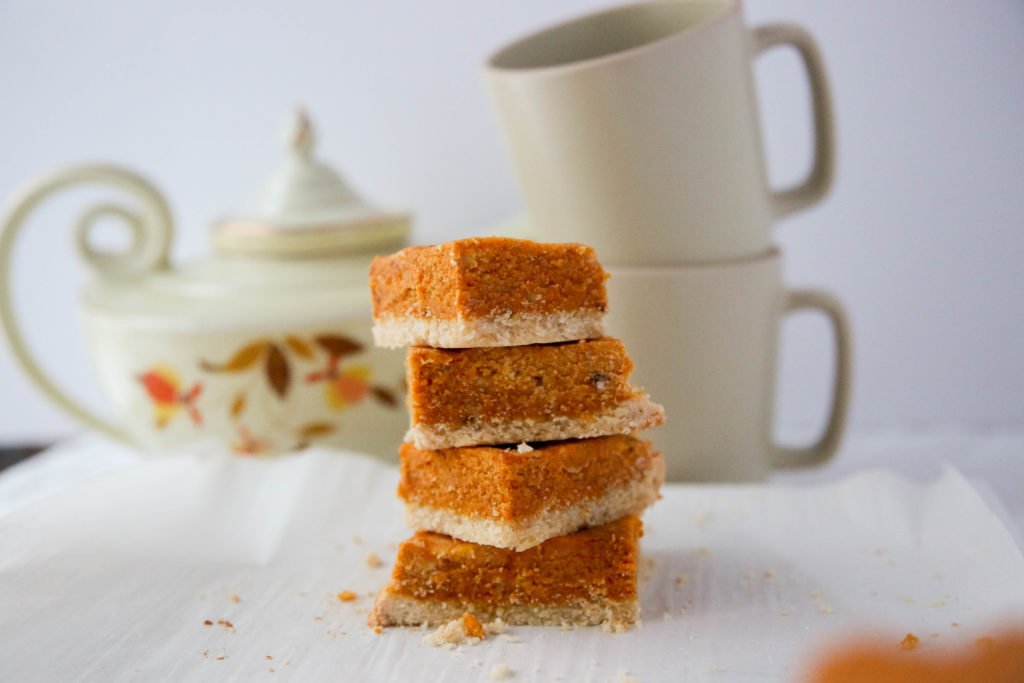
This is your finished product:
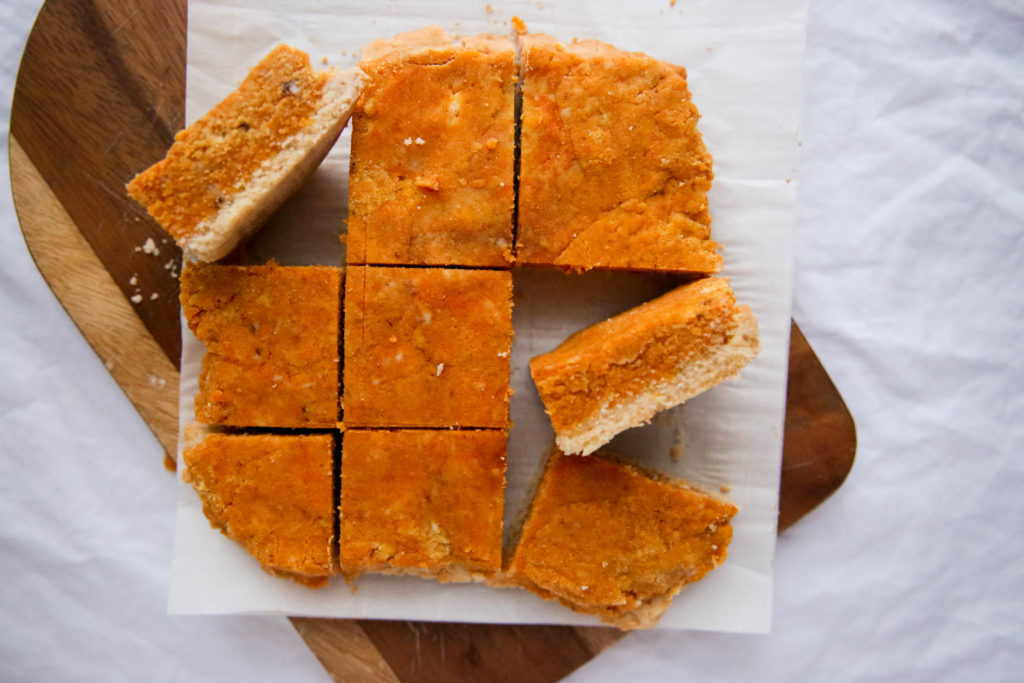
Looks pretty amazing, right?
The color of these AIP pumpkin pie bars is just gorgeous. Who would see these and not want to dig in?
Yes! this recipe is for gluten-free, dairy-free pumpkin pie bars. People with dietary restrictions and those without any dietary restrictions are both going to love them. You could call these healthy pumpkin pie bars a real crowd-pleaser that your whole family will enjoy trying out.
You've gotta have a sweet taste to make a good pumpkin pie bar, right? But you don't need the refined, processed sugars that are like poison to our bodies. These sugar-free pumpkin pie bars get a sweet touch from the maple syrup that is used in both the crust and the filling layer. In fact, maple syrup is a great substitute for a lot of sweeteners. You'll find plenty of maple syrup baking recipes online. Or try switching it out for another sweetener, like on your oatmeal in the morning, or top your coconut yogurt with a drizzle of it. Just be sure that you are using 100% maple syrup, nothing with added sugars like the syrups you typically find on grocery store shelves.
Let me be totally clear: the typical vanilla extract that you get off the shelf at regular grocery stores is likely not going to be AIP compliant. If you want AIP compliant vanilla extract, then you need to make sure you get a kind that doesn't have alcohol in it. Consider, too, getting a vanilla powder instead of using a liquid vanilla extract. You could also choose a fresh vanilla bean and scrape out the insides to use it.
I hope that clears up most of the common questions that arise when it comes to AIP pumpkin pie bars. Now, let's get to the full recipe!
Crust
Filling
Happy eating!