I think anytime of year is the right time for a good soup. This AIP clam chowder is filling, creamy, and packed with a punch of great nutrients. Some soups can leave you feeling a little wanting, as if you're wondering where the next course is. But with this AIP clam chowder, you'll be full and satisfied after a single bowl.
If you want to make this an even more delicious meal, I'd suggest a good salad on the side. I like my salads with a ton of greens, cucumbers, carrots, olives, and more -- all depending on your personal and dietary preferences. Don't forget to top your salad with some heart-healthy extra-virgin olive oil, and some vinegar to give it a zing. I usually choose balsamic vinegar, though apple cider vinegar is a great choice, too.
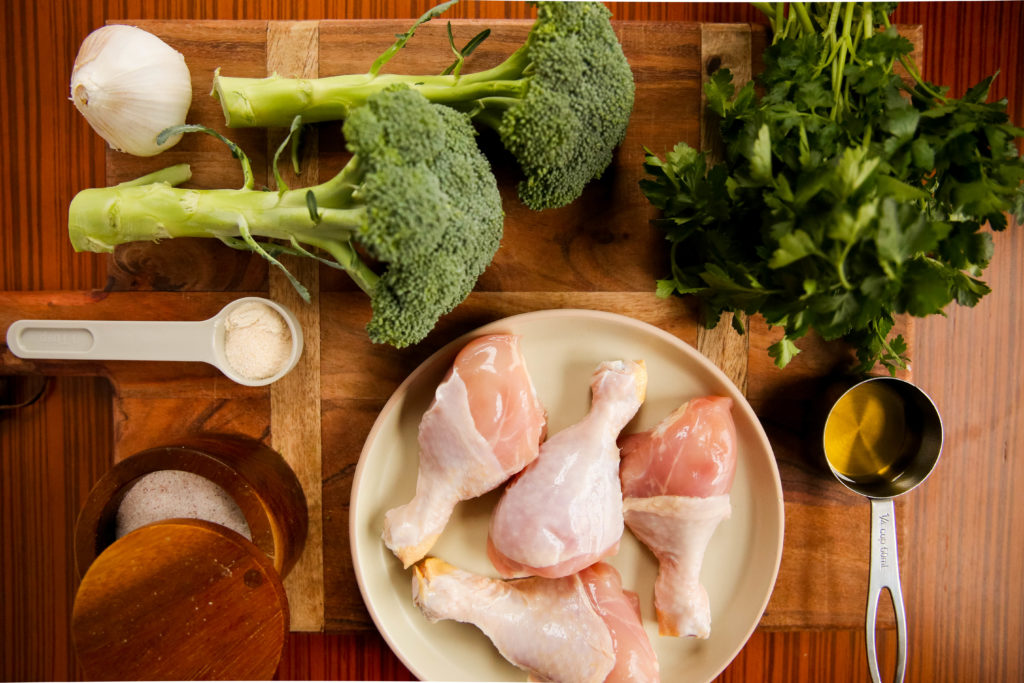
Ready to get cooking? Great. The first step is to gather your ingredients. Here's your list for this AIP clam chowder recipe:

Now, I know that not everyone will like my choice of vegetables. Maybe you were forced to eat too many turnips as a kid, or parsnips have never been a taste you've enjoyed. But I purposely make these recipes to be versatile. Cut something out or replace it with a vegetable you like better. Your AIP clam chowder recipe will still turn out great!
After you've gathered your ingredients, you can get started with making your AIP clam chowder.
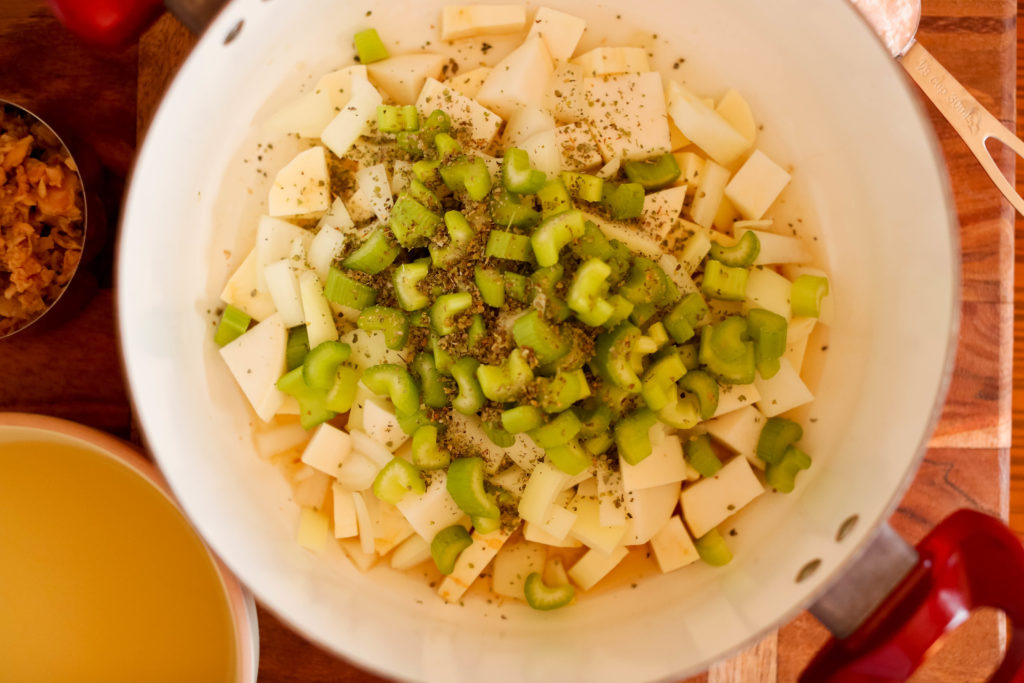
First, you'll put the bacon grease into a large stock pot over medium heat. Add in the celery, parsnips, onion, turnip, marjoram, and salt. You'll want to cook it until the onions are translucent, which usually takes about five minutes.
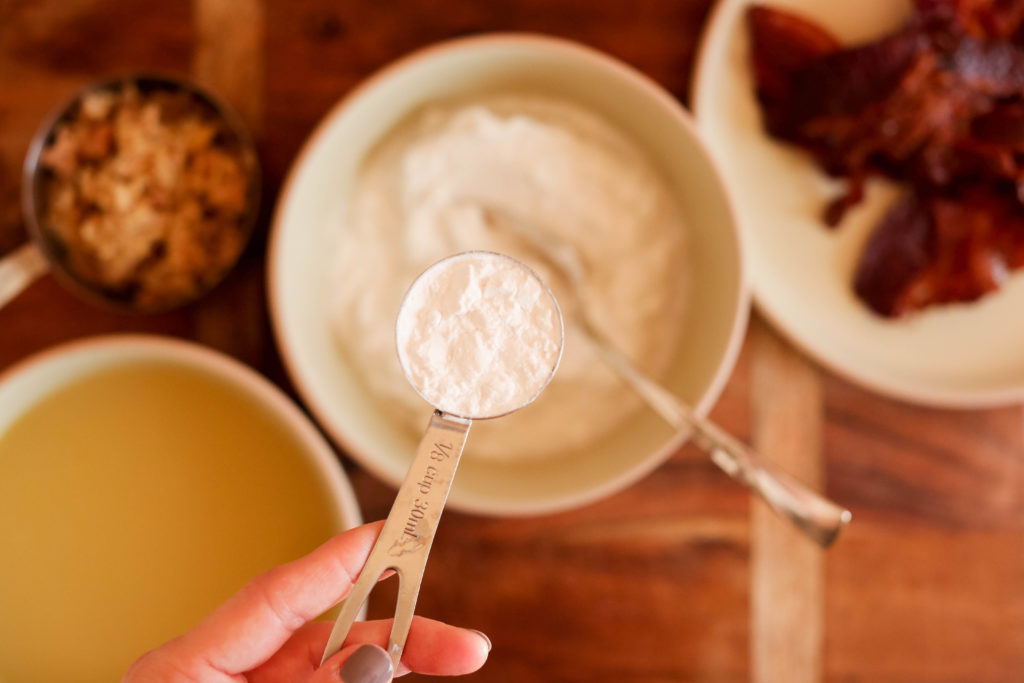
Now, if you sit and watch it cook, nothing will happen, right? The whole "A watched pot never boils" saying? So, meanwhile, you're going to get out a small separate bowl. In that, you'll put the coconut milk, then add the arrowroot starch. Stir them together and set the bowl aside.
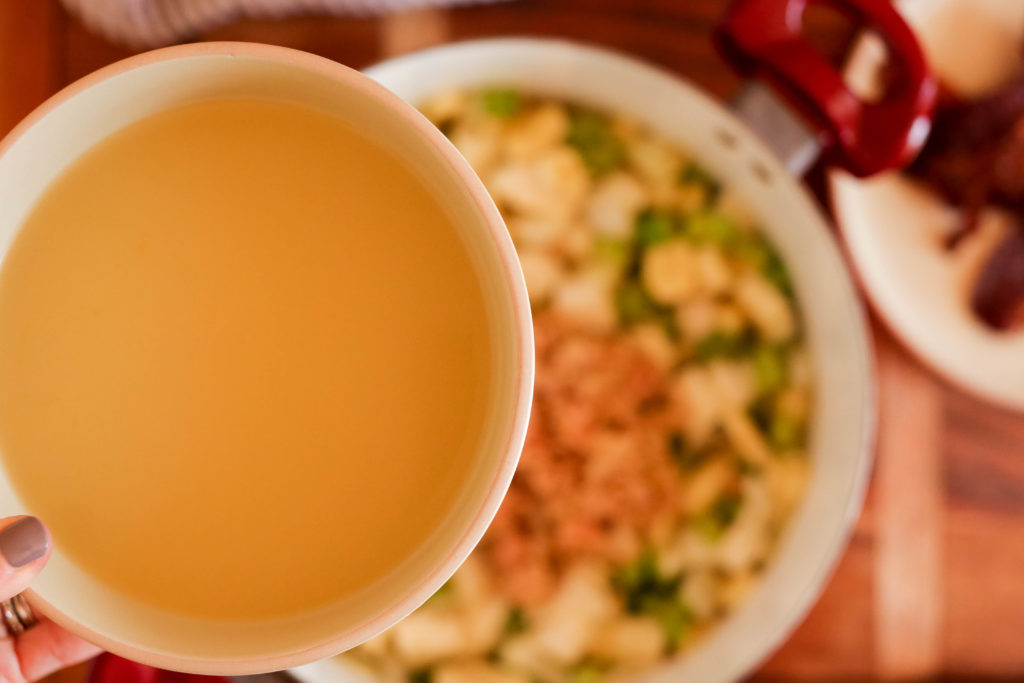
Then, it's time to turn your attention back to the big stock pot. Those onions should have turned translucent by now. You're going to add the clams, clam juice, and bone broth to your fragrant mix. Bring it all to a boil, then reduce the heat to a simmer. You'll let that go on for about 20 minutes, until the turnips and parsnips can be pieced by a fork.
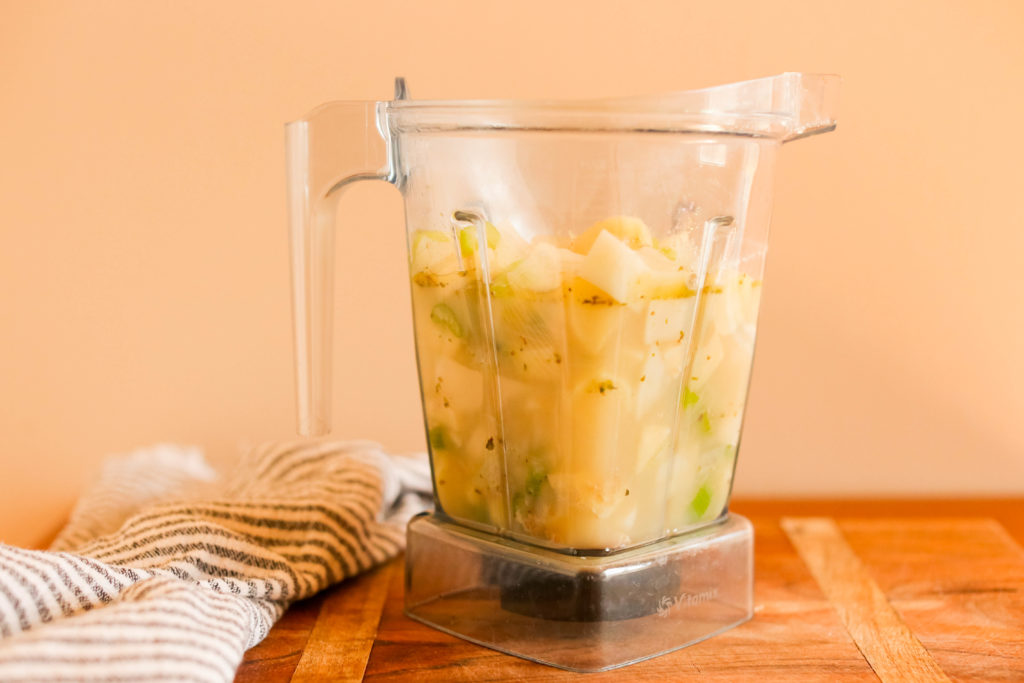
Now is when we make the soup creamy. You'll add just half of it to a blender, then add that back to the pot. If you like a chunkier soup, put a little less in the blender. If you like a smooth soup, you could even do the entire amount.
You're down to the final step now.
It's time to grab that bowl of coconut milk and arrowroot starch that you stirred up before. Add that to your stock pot.
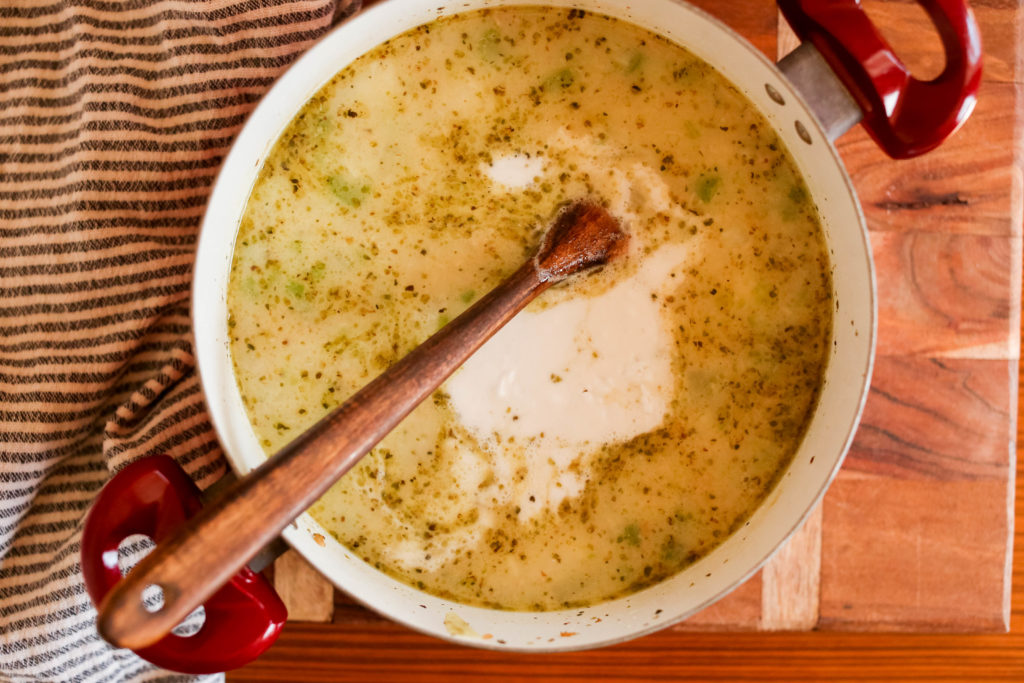
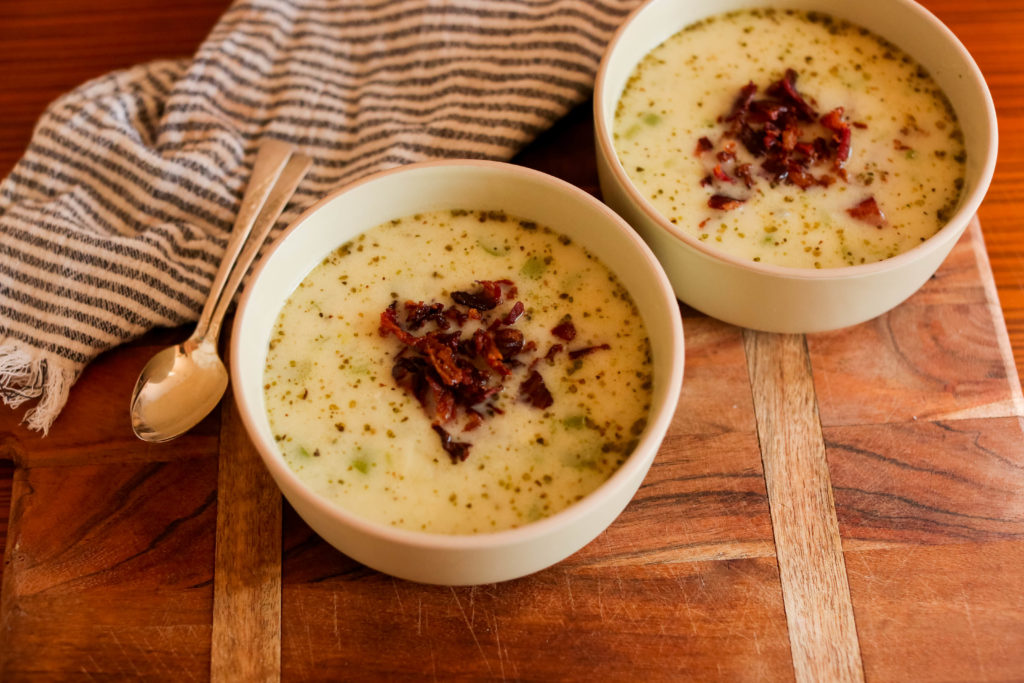
Stir that to combine. Finally: it's time to dish up! Spoon some of this delicious mixture into a bowl, then top it with the bacon you cooked earlier and used the grease from to saute all your veggies.
Your soup should look a little something like this:
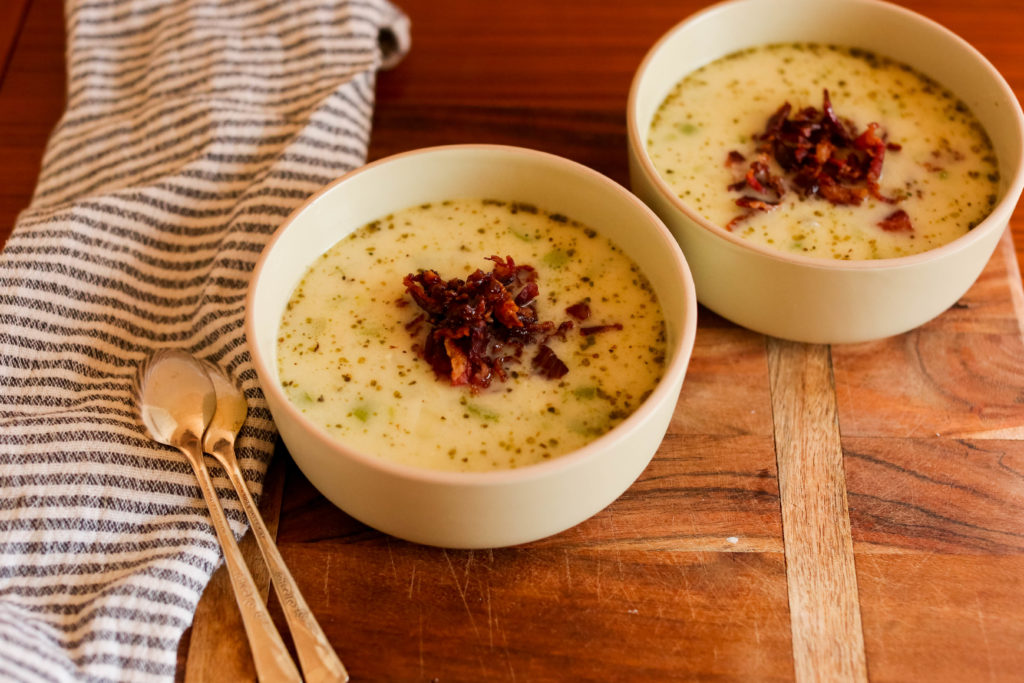
Yes! This recipe is for a dairy-free clam chowder. No milk, butter, or other dairy products are needed to make a delicious clam chowder. Typically, clam chowder contains dairy such as cream, which gives the soup that typical consistency. In this instance, however, between blending some of the soup, and the slurry made from arrowroot and coconut milk, it's just not necessary.
There are thousands of clam chowder recipes out there, as you know if you've searched for a recipe online before. This recipe, however, is a healthy clam chowder. It's packed with veggies, which will give you a lot of great nutrients. AIP clam chowder means it's autoimmune protocol compliant. The autoimmune protocol removes all foods from your diet that can cause inflammation.
Yes! This is a 100% gluten-free clam chowder recipe, so if you are gluten-sensitive or allergic to gluten, this is a perfect recipe for you to make and enjoy. The more traditional clam chowder recipes contain gluten, however. The use of flour to thicken the soup is common in clam chowder recipes. But rest assured, in this AIP clam chowder recipe, there is no gluten involved!
AIP clam chowder is an incredibly healthy choice if you're looking for a nutritious AIP meal. Let's take a look at some of the nutrient profile in this recipe: first off, there are parsnips and turnips. Both contain a good amount of Vitamin C, which we all know is necessary for healthy teeth and bones, a strong immune system, and much, much more. Each of these veggies has some great fiber in them, too. When you have your turnips and are preparing them, don't get rid of the greens! Those can be delicious on their own. Try turnip greens sauteed in bacon grease -- you'll love them!
Then, consider that this AIP clam chowder recipe also includes bone broth. Now, you could certainly use a plain, regular broth. But there's a good reason I talk a good amount about bone broth and why everyone should be including it in their diets. The nutrients involved in bone broth are going to vary based on if you're making your own, or which type you buy. If you want to try your hand at making your own, here is a great AIP recipe.
Bone broth can be the key to getting your best gut health yet. It is high in collagen, minerals, amino acids, glucosamine, chondroitin, hyaluronic acid, and more. These nutrients work together to help with digestion, reduce inflammation, protect the gut lining, improve sleep and brain function, and reverse leaky gut!
Then, there are the clams themselves. We can't leave those out, because of the great nutrients they contain! Clams are high in protein, low in fat, and contain minerals such as potassium, iron, and phosphorus. Plus, unlike other forms of seafood, they are ecologically sustainable and carry a low risk of toxicity.
So, are you ready to get to the recipe in full? Here it is!
Happy eating!
Whether you're a person who enjoys spending time in the kitchen...or goes into rapid speed mode to get the cooking done...who wouldn't want a quick, easy meal? That's just what this chicken drumstick sheet pan dinner is. Though I've used drumsticks for my chicken sheet pan recipe, you can switch that up to your preferences. You can also choose the vegetables you like the best for this chicken sheet pan dinner.
Like many of the recipes I've put out on my blog, this one is pretty adaptable.
So if there are not enough spices, you want to use different chicken pieces, or you're just one of those people who has to switch up recipes as you go along, please feel free with this one.
What could be simpler than an AIP chicken recipe? Not much! Let me walk you through how to make this chicken drumstick sheet pan dinner recipe.
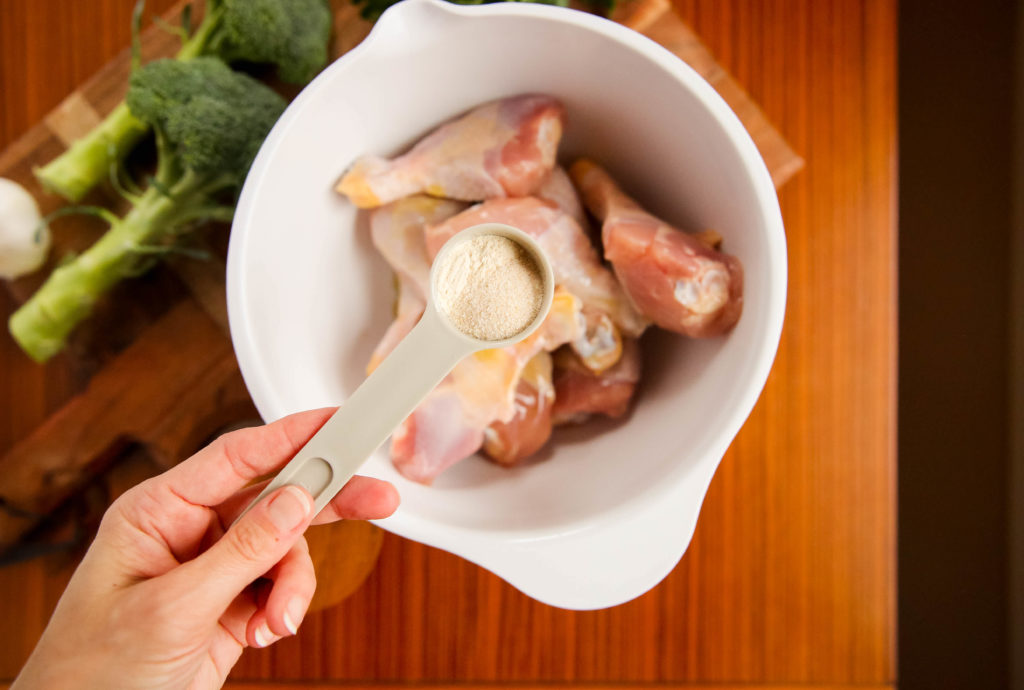
As usual, you're going to want to gather your ingredients first. Here is the list:
You'll need a single large bowl that you're going to use to toss all the ingredients together. In it, place the drumsticks, avocado oil, sea salt, and the garlic and onion powders. Use your hands to gently toss it all together, making sure that the drumsticks are coated with all the delicious ingredients.
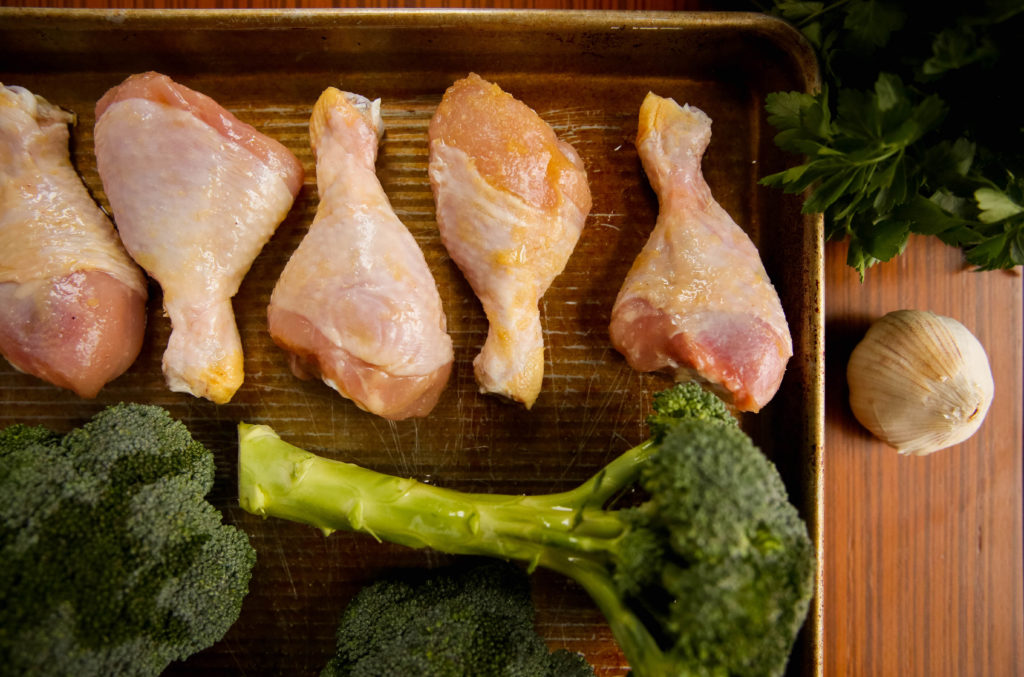
Then, add all that good stuff to a baking sheet. There will be some of the "marinade" at the bottom of the bowl, and you'll want to drizzle that over the chicken, along with whichever vegetables you've chosen for your chicken drumstick sheet pan recipe.
Are you starting to appreciate how simple this recipe is?
Hardly any prep time, right?
Okay, so the last part is the actual baking of your chicken sheet pan recipe. You'll want to put it in your preheated oven and bake for about 35-40 minutes.
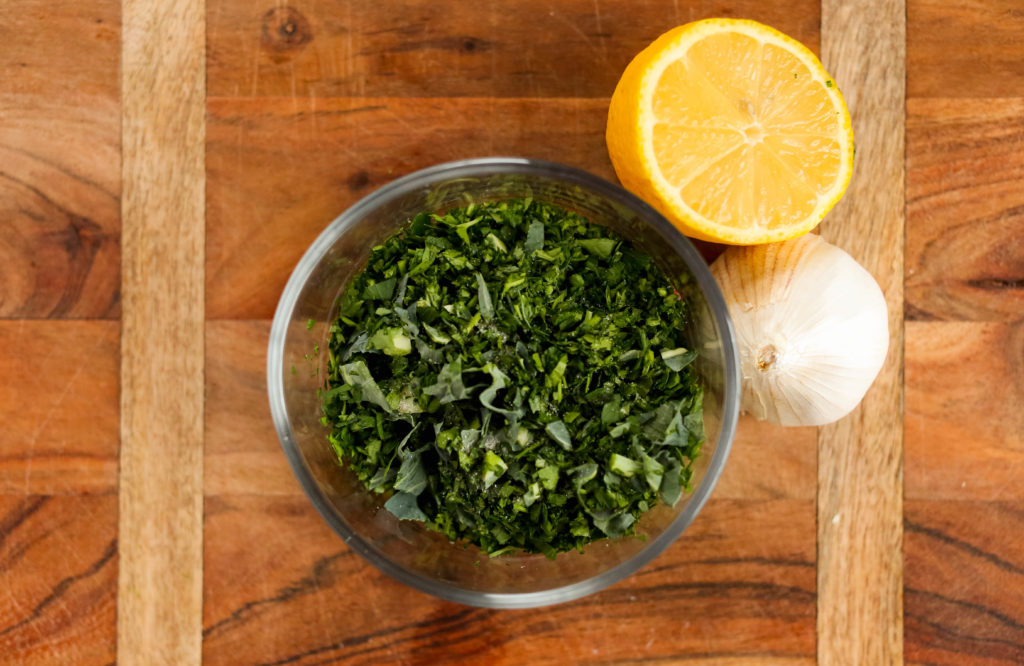
While that's going on, you'll get this amazing parsley mixture going. Add chopped fresh parsley, olive oil, sea salt, and lemon juice to a bowl and mix it well. I know a lot of people will wonder if they can substitute fresh parsley for dried. But it's not just about the flavor -- it's about the amazing green freshness it adds, too. I wouldn't skip it if I were you!
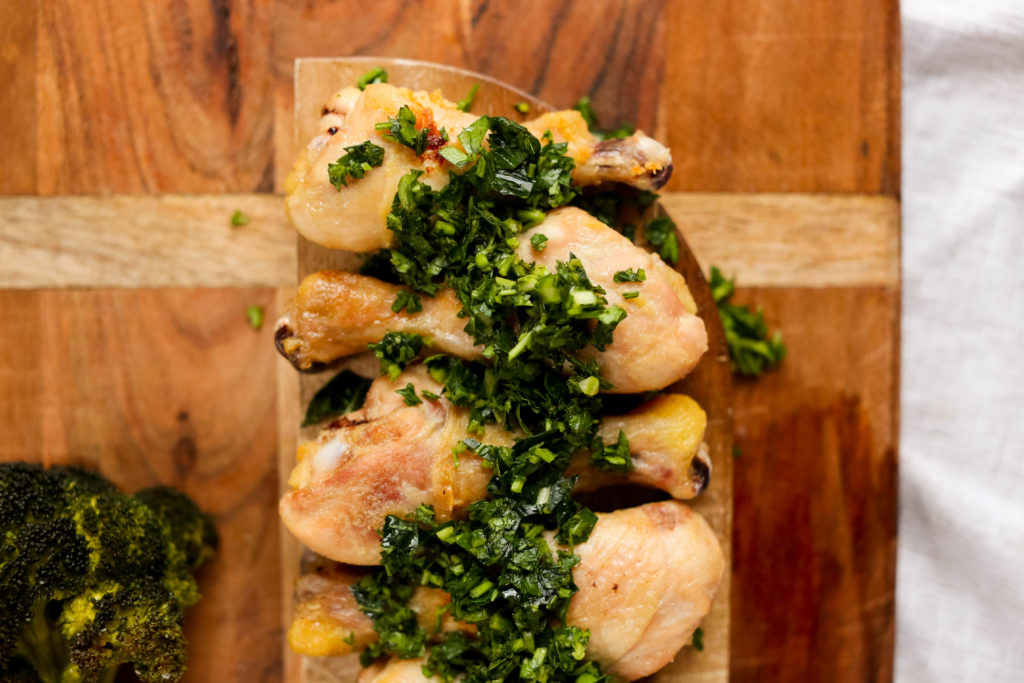
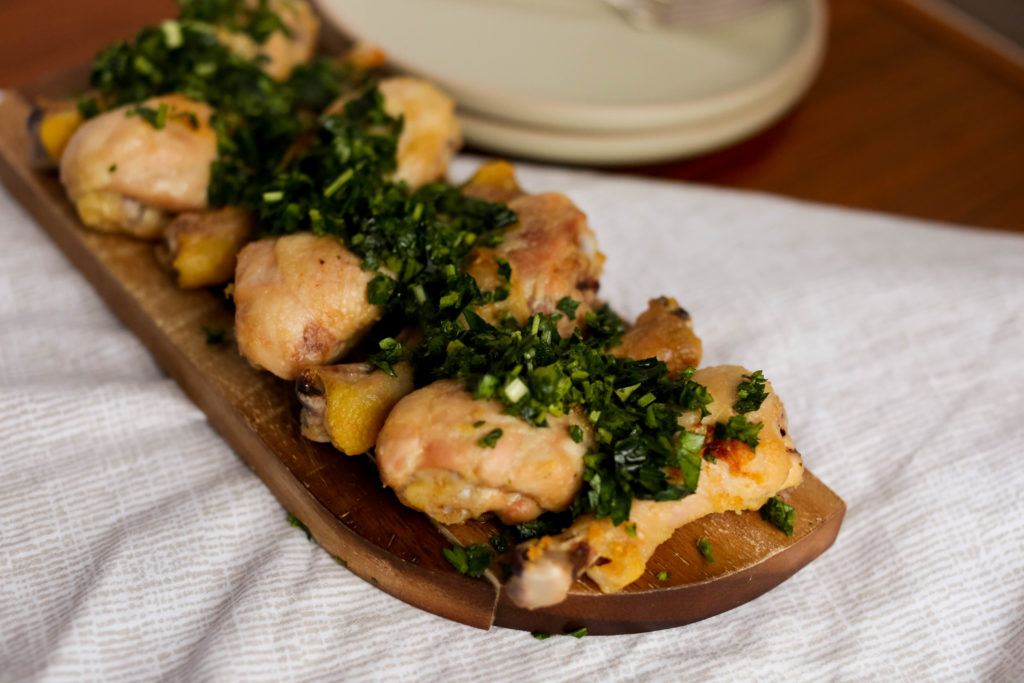
Since oven baking times can vary so much, I use a meat thermometer to know when my chicken is done. When it reaches 165°F, the chicken is done. Take it out of the oven, plate, and sprinkle it with that tasty parsley mixture.
All done!
So, let's get to some commonly asked questions about this chicken drumstick sheet pan recipe.
Chicken drumsticks are delicious and packed with nutrients, but there is no reason you can't use another part of the chicken. I'm a big proponent of not wasting any part of the animal. I even recommend you get a whole chicken and use the non-edible parts for bone broth! To learn more about bone broth, I recommend you check out this website.
In this recipe, you can use any pieces of the chicken. I think it could get a little dry if you use chicken breasts. Chicken thighs, however, would work quite well. But either way, as long as you heat your chicken to 165°, it will be properly cooked.
A chicken sheet pan dinner recipe is pretty easily adapted. If you don't like broccoli, which is what I chose to include on my chicken and vegetable sheet pan recipe, you can definitely look at some other options. Consider roasted carrots and potatoes or a roasted vegetable medley of whatever is in the fridge that needs to be used up. Vegetable roasting time varies depending on what you're using, so keep that in mind.
In this recipe, I cooked the chicken drumsticks at 375°F. Sometimes, chicken is cooked at 400°. But the key is to have a meat thermometer. With that, you can measure the exact temperature of your chicken drumsticks. Once it reaches 165° internally, you know it's done, regardless of the temperature a particular recipe calls for.
There's a good reason I wanted to make this chicken sheet pan recipe. Chicken legs are full of nutrients! So first off, let's get this straight: chicken drumsticks and chicken legs are the same thing. The drumstick is just what we call the leg of the chicken. The nutritional profile is going to differ depending on the size of your drumstick. The average-sized chicken drumstick packs a protein punch, coming in at around 13 grams. Chicken leg nutrition also contains a good deal of the recommended daily intake of Vitamin B12, selenium, and phosphorus.
Autoimmune protocol recipes are designed to remove all possibly sources of inflammation from the food you eat. I recommend this type of eating to a lot of my students in the Cellular Health Accelerator program (if you want to learn more about me and what I do, please feel free to have a look around my website). It's highly beneficial for people who know that certain foods may not be good for them, or may be worsening their condition, but they're not exactly sure which foods those are. AIP chicken recipes are a great bet to get lean protein with tons of other nutrients.
If you're curious to learn more about autoimmune protocol, or AIP, I recommend you check out some information on Dr. Sarah Ballantyne's website. She is a pioneer in the field of AIP and has a true wealth of resources for you to check out on her website. This AIP chicken recipe is a great starter that you can even use as a base if you're just getting started with a new diet.
When you're all done, you'll have a beautiful dish that looks something like this one. I think your entire family will go for it!
Who doesn't like a good stew recipe? Stew is like the marriage of a casserole and a soup. It's hearty, filling, and always makes the house smell great. The AIP stew recipe I have for you today is great because of its versatility.
You can actually use any meat you'd like. In this one, I've made a healthy lamb stew. But if you don't have lamb or prefer to use something like beef for your AIP stew, go ahead and switch it out. This recipe for lamb chop stew could easily be an AIP beef stew, too.
Here's what you'll need to make this AIP stew recipe:
I've used fresh herbs in this recipe, because I feel like it gives this healthy lamb stew a great taste. But if you don't have those handy, you can always give it a try with the dried versions. Feel free to tailor that to your preferences if you'd like to leave something out, or switch one herb for another.
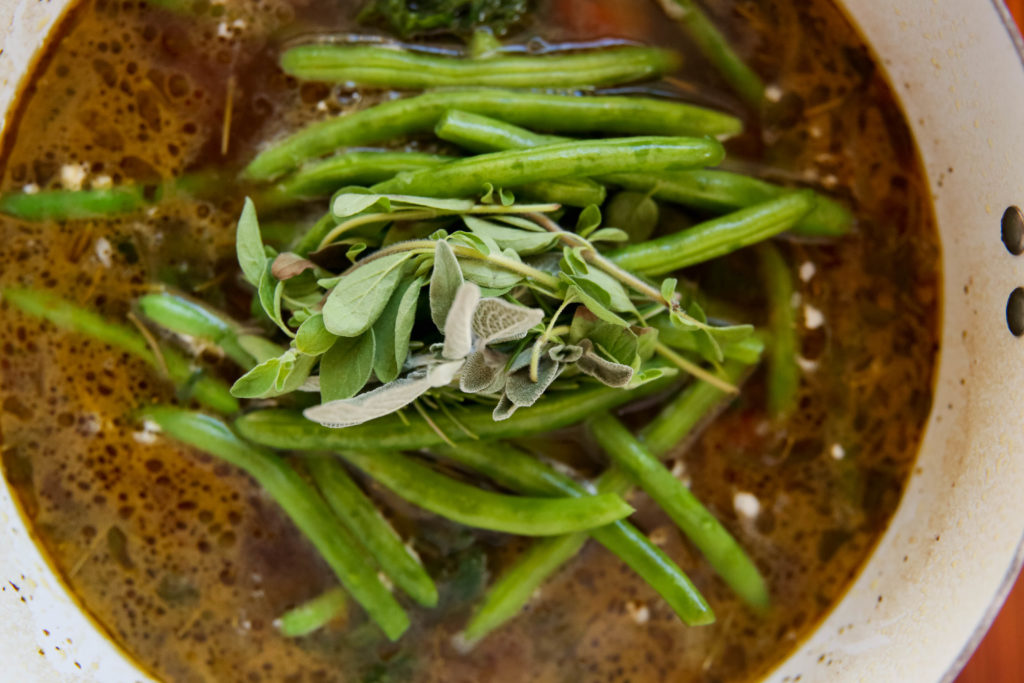
I'm always looking for ways to up the nutrient density in the foods I eat. The add-ins I've chosen to complement this lamb stew with rosemary include spinach, green beans, and marjoram. A lot of people eating strict AIP will want to omit the green beans. If you choose to add spinach, you can use fresh or frozen. You could probably use about an entire bag of the fresh stuff, because it wilts down to practically nothing.
And if you use frozen, they come in handy little cubes, so you can just toss a few into the stew, stir it around, and see if you want to add more in. I love the idea of using these frozen spinach cubes for smoothies, too. It'll keep it super cold without watering down the smoothie like too much ice would.
Absolutely. A classic beef stew is always something to look forward to making. Put a healthy twist on it by making this an AIP beef stew. This healthy lamb stew could easily be a healthy beef stew.
Yes! You can definitely combine different meats. It will give your stew a depth of flavors and textures to enjoy. And if you want my best tips on the type of meat I buy (not just for stew, but anytime I'm at the grocery store), I have a video on my YouTube channel about that.
This AIP stew is nightshade-free. If you're sensitive to nightshades or eating AIP-compliant, you can still make this without worrying about its effects on your stomach.
Bone broth tastes a lot like traditional soup broths. But it's even better, because of the extra nutrients it contains. You can drink bone broth for leaky gut and other conditions that can benefit from its healing properties, or as a part of your everyday routines. I have plenty of students in my Cellular Health Accelerator program who drink a mug or two of beef broth daily. Sometimes, it even replaces their coffee habit that used to wreak havoc on their guy!
I like grass-fed beef bone broth when I have mine. This recipe calls for beef broth. But you need to be careful if you're using store-bought bone broth. These can often have multiple unnecessary additives in them. So be sure to read the label before you purchase!
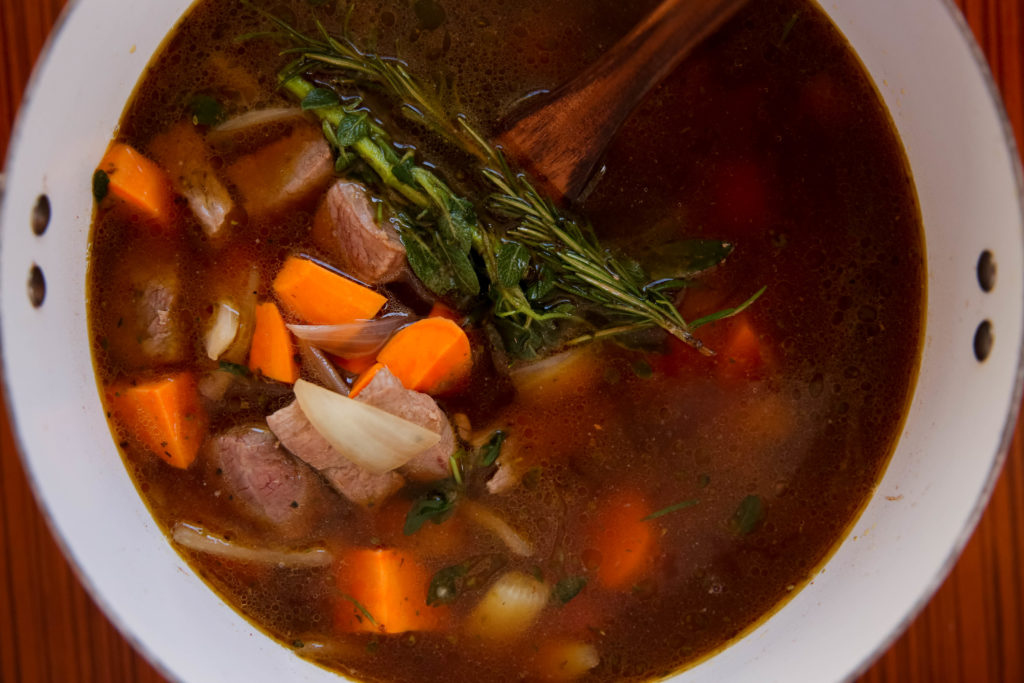
Have you noticed that my recipes tend to not have too many steps involved in preparation? This rosemary lamb stew is no exception. Gather your ingredients according to the list above.
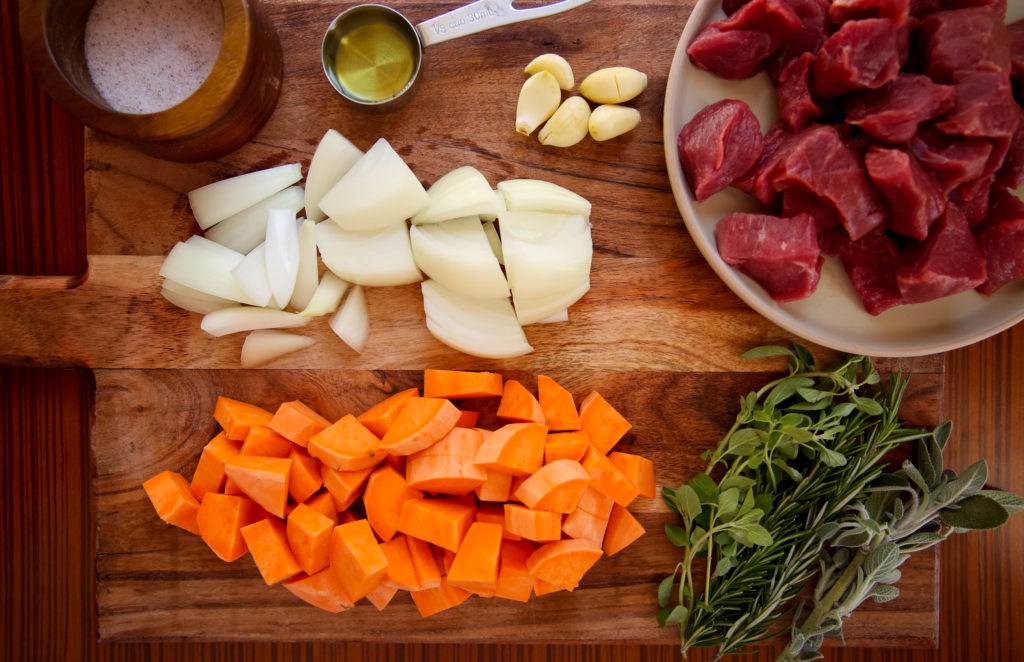
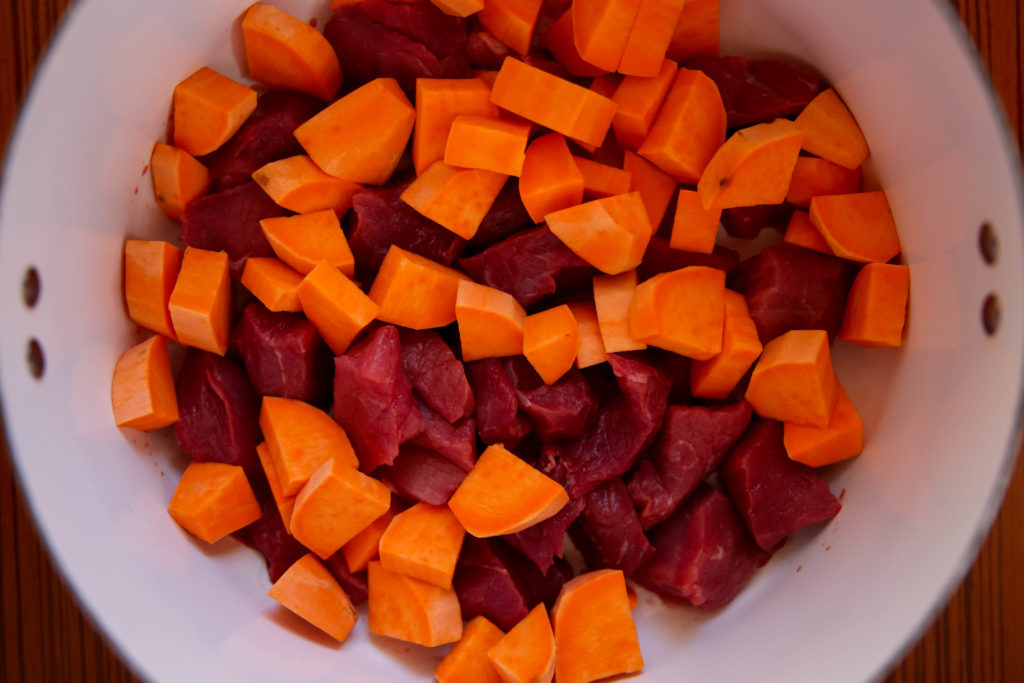
You'll start by heating a large stockpot on medium. Add your avocado oil, stew meat, and potatoes, then cook for about 5-7 minutes.
After your stew meat and sweet potatoes have softened a bit, then you're going to add in the onions, garlic, herbs, and sea salt.
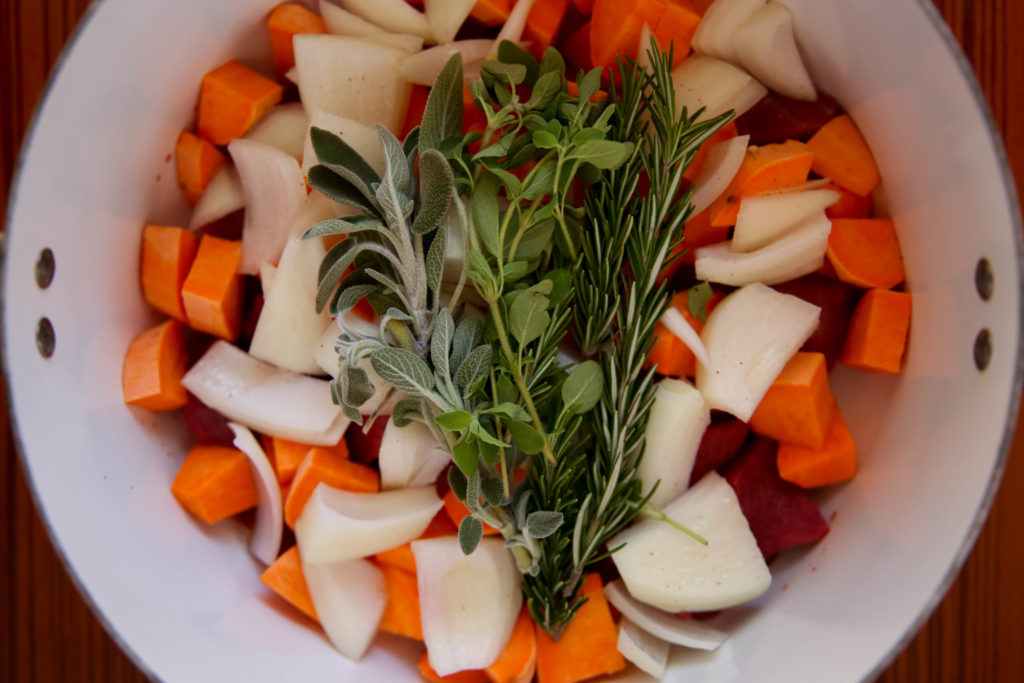
Give that about five minutes to all cook together. This is the part when everyone else in the house starts to say, "What smells so good?"
You'll know it's time to add the bone broth in when the herbs are nice and fragrant, and the onions have become translucent.
It's time to toss in any of your add-ons, too. Get creative here -- what's in the fridge or freezer you might need to get rid of?
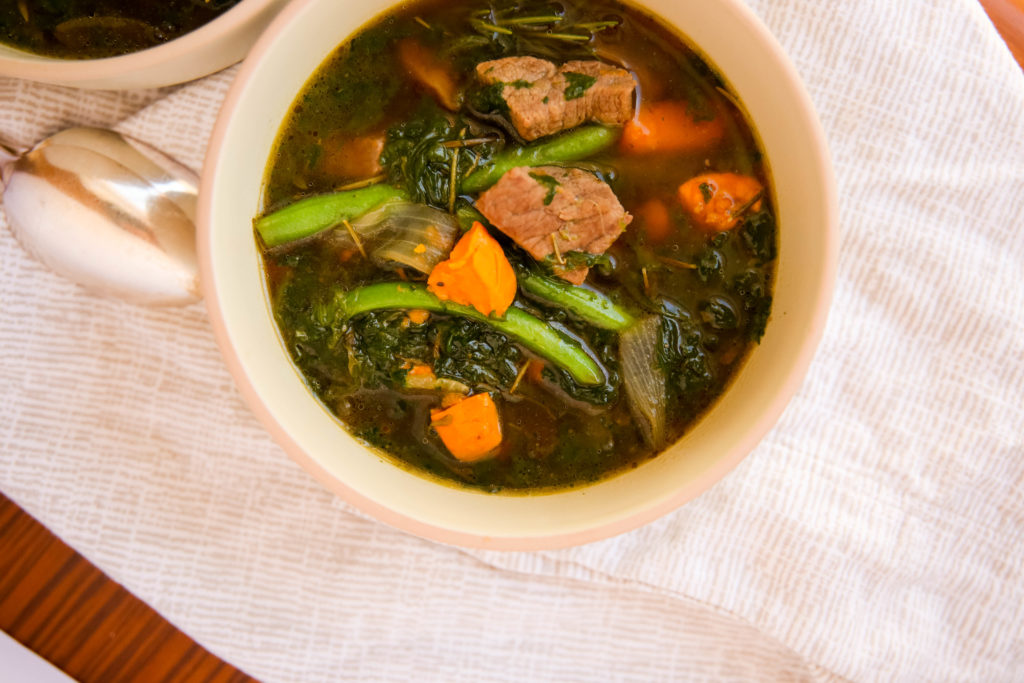
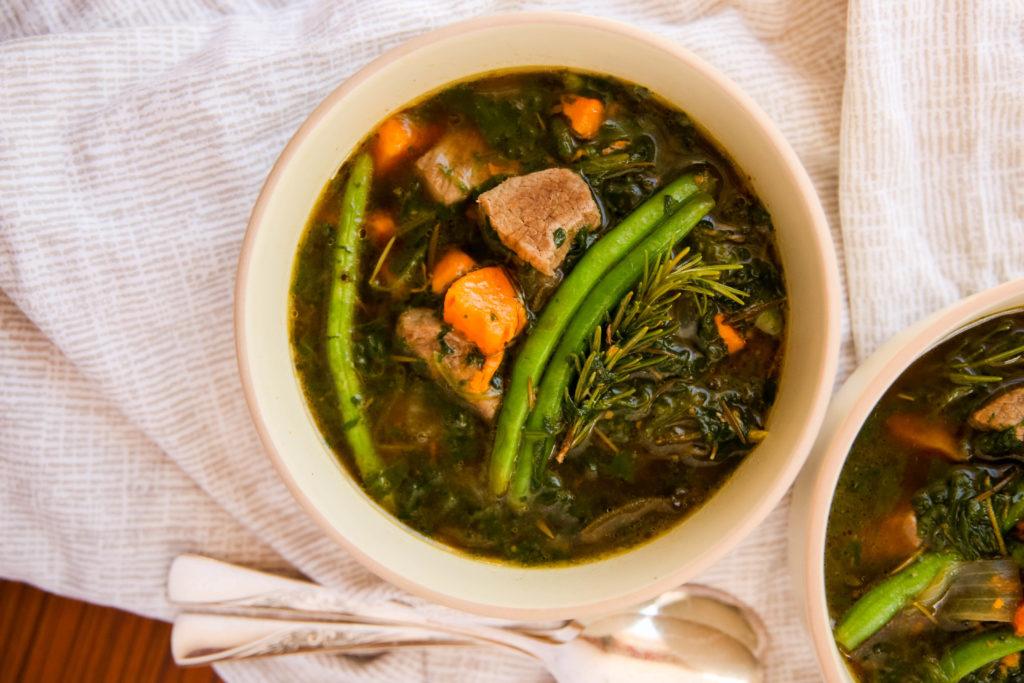
With your broth added, you'll want to let it simmer for over an hour, which will make the meat nice and tender. Then, you're ready to enjoy your AIP stew! Dish it up and wait for your family to start singing your praises.
Ready for the full recipe?
Happy eating!
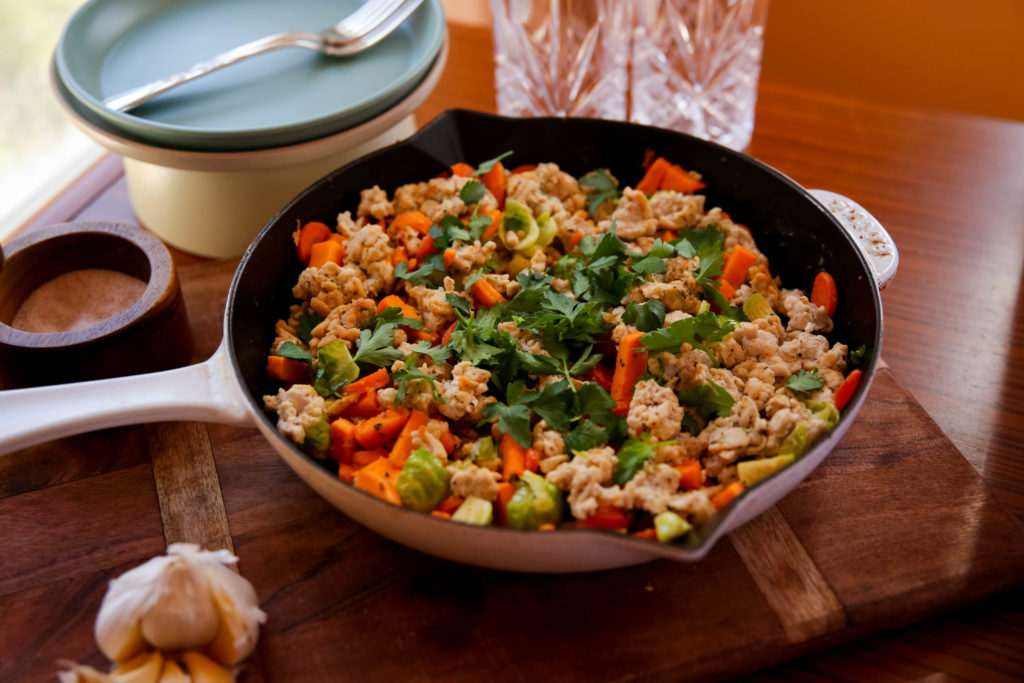
Looking for an easy breakfast idea? This sweet potato breakfast hash will be perfect. Whenever a student asks me or our health coaches what they should eat for breakfast, we often tell them: a sweet potato hash. It's easy, full of healthy fats and protein, and has an extra punch of nutrients from vegetables.
A hash is pretty simple. This one is a ground turkey hash, so the base of it is made from a lean meat. Add in some veggies and herbs, and you've got a tasty combination.
My turkey hash recipe includes sweet potatoes, which have nutrients such as
...and more! Then, there are carrots added, which contain Vitamins A, K, and potassium. The Brussels sprouts are a member of the cruciferous vegetable family. Their nutrient profile includes folate, Vitamin C, and fiber.
You don't need to have an ingredient list as long as your arm to get this kind of nutrient density, either, as you'll see in this ground turkey sweet potato hash recipe!
You'll want to start by gathering your ingredients. Hopefully, you'll already have quite a few as staples in your pantry and fridge. Here they are for this turkey hash recipe:
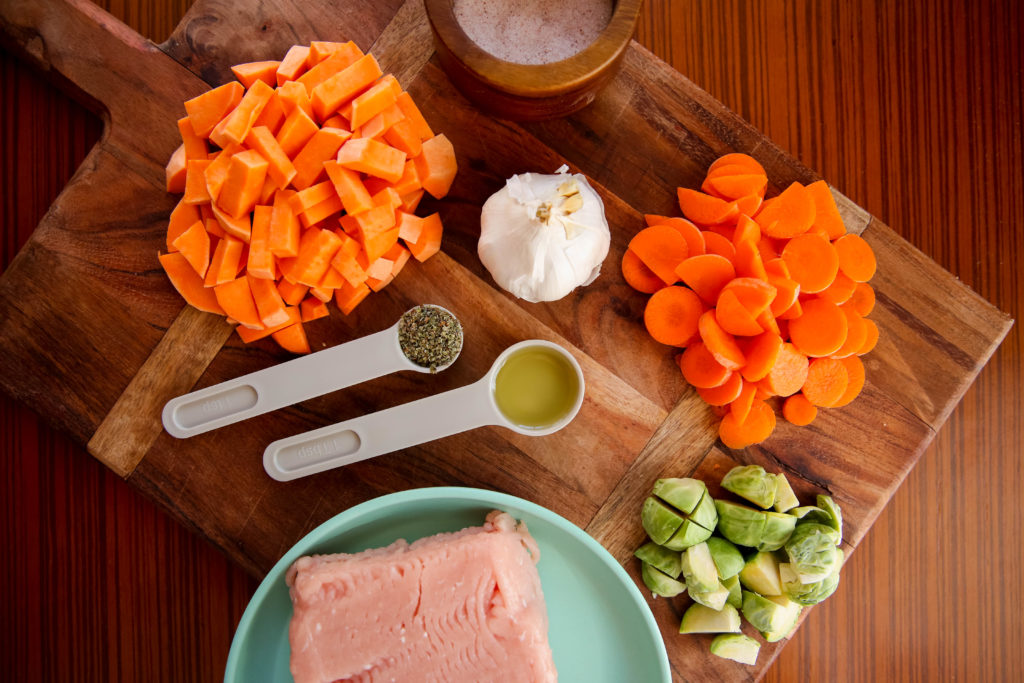
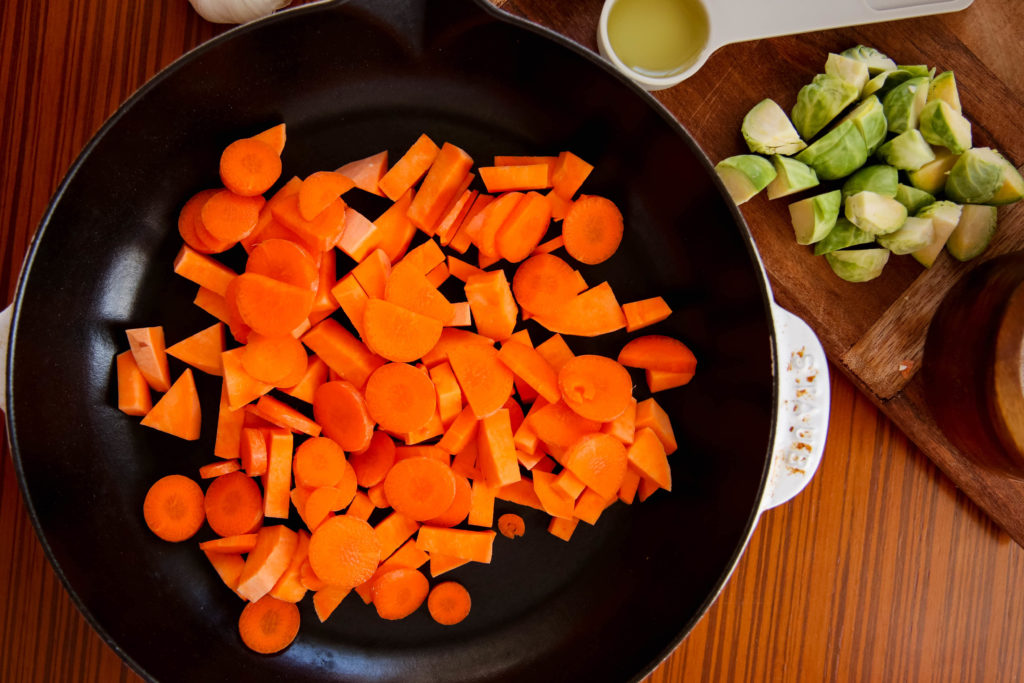
What's nice is that you'll only need one pan for this recipe. To that pan, you'll add avocado oil, sliced sweet potatoes, and sliced carrots. Let it cook up and soften for about 10 minutes.
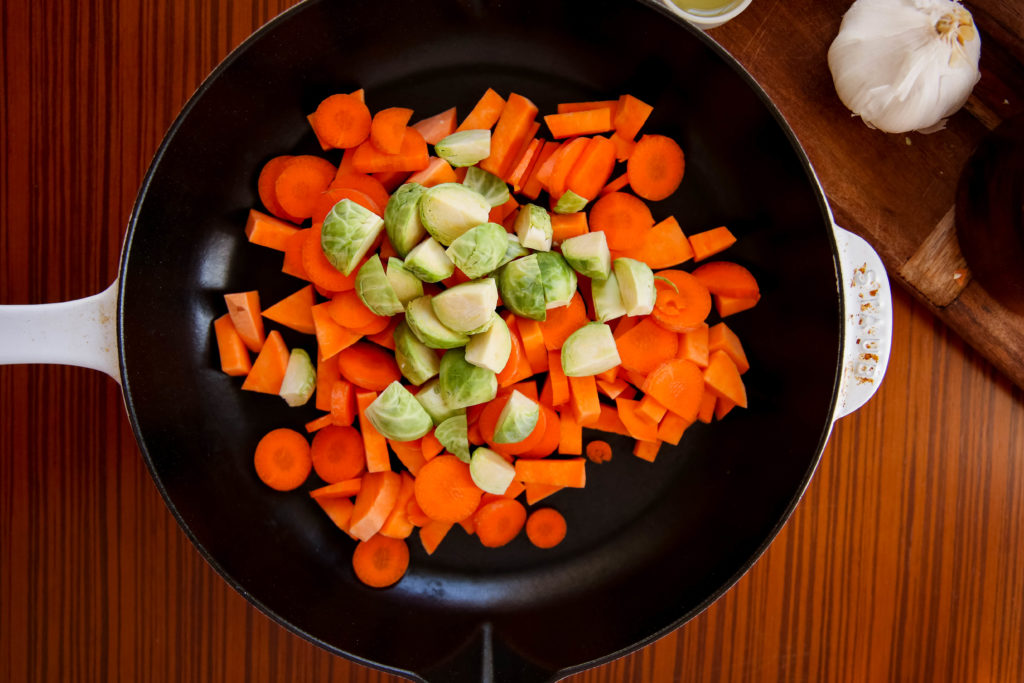
Then, toss in quartered brussels sprouts, garlic, marjoram, and sea salt, cooking for another 5 minutes.
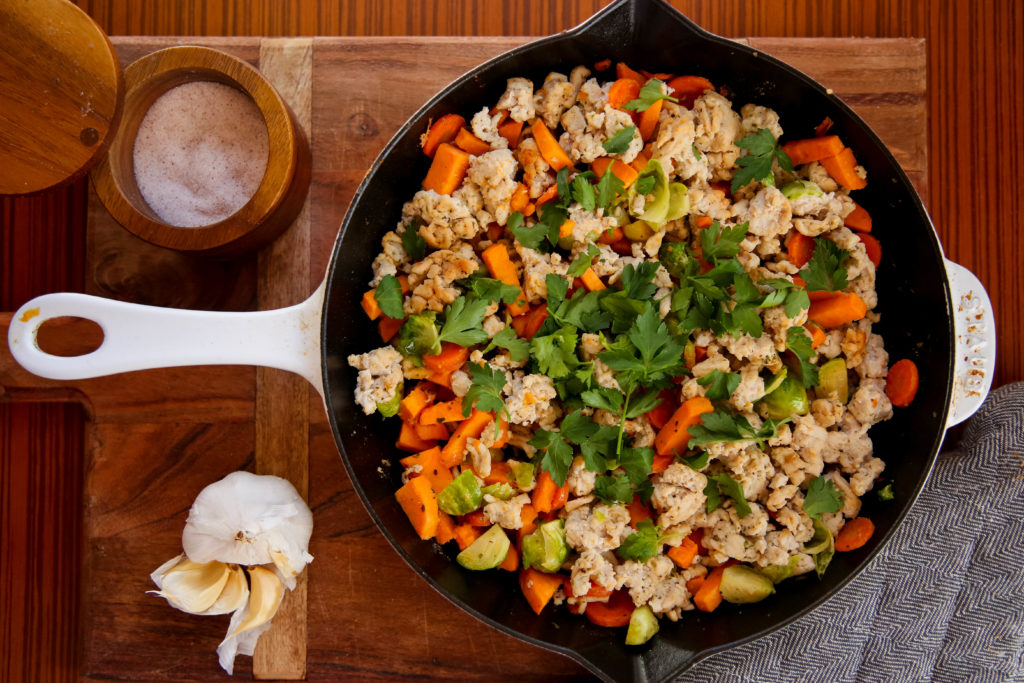
The final step is getting your ground turkey added to the pan. Break it apart with a spatula or other utensil, allowing it to cook through. It should take about 5-7 minutes in total.
Top it with some fresh herbs and serve right out of the pan!
It sure is! A paleo diet means that you eat like our ancestors did. Whole foods are the hallmark of a paleo diet. There is a focus on lean meats, like ground turkey, and getting plenty of vegetables in. This ground turkey sweet potato hash would fit the bill perfectly.
A lot of people overthink the idea of breakfast hash. It could be made with just about anything you need to get rid of in the fridge. The goal is to have a meat for protein, vegetables for nutrient density, and other flavor additions like herbs and sea salt. The combinations truly are endless for a good breakfast hash!
Yes! I often recommend to people to eat what is called autoimmune protocol, or AIP, when they want to extinguish the flames of inflammation that are causing issues in their bodies. This breakfast hash is AIP compliant and a fantastic way to start your day that won't involve a blood sugar roller coaster.
If you're fortunate enough to have leftovers, this breakfast hash will store in the fridge for a couple of days. I also want to take the opportunity to mention that it's a good idea to invest in a set of glass containers if you don't already have them. I don't recommend storing anything in plastic, and definitely don't reheat any food in the microwave in a plastic container. If you need to invest in some glass storage containers, here is a link to a set of pretty good ones (I don't get anything from Amazon by directing you there; I'm simply trying to be helpful).
People can have a really hard time switching over from eating bread and cereal in the morning to a better balance of fat, protein, and fiber. I have a YouTube channel that you may have checked out before. On it, you'll find more videos that you will find helpful for breakfast ideas. That includes this video talking about my typical breakfast, as well as videos like this one that will walk you through other great breakfast ideas.
Ready for the recipe in full? Here it is:
That's all there is to it. And remember, you could do this with a ton of different combinations of meat, veggies, and herbs, depending on what you have on hand.
I hope you enjoy this ground turkey hash recipe!
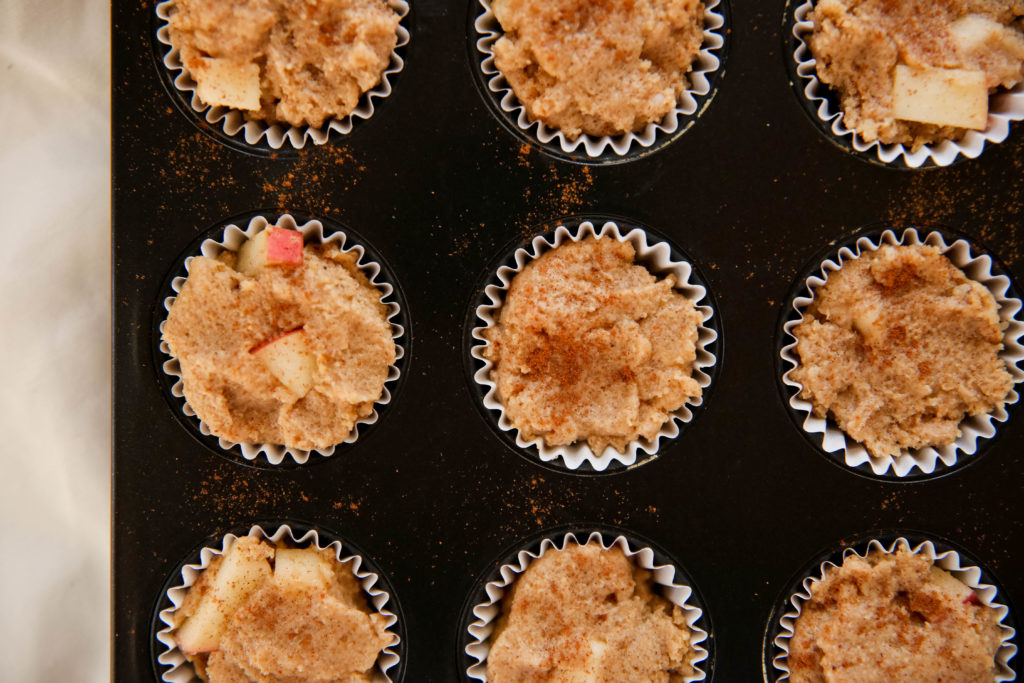
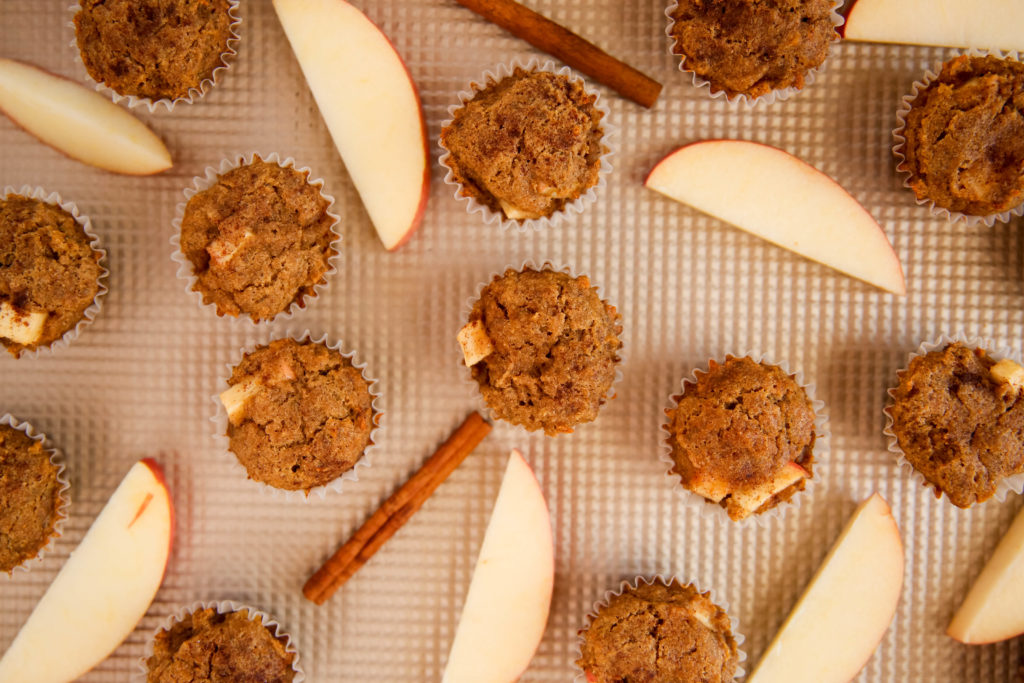
Here's a recipe that is going to taste great any time of day: gluten-free apple crumble muffins.
This recipe is perfect if you have company over and want to serve them a little treat. Want to turn it into a dessert? Serve these apple crumble muffins with some whipped coconut cream to make them an AIP/Paleo after-dinner treat. They're a fantastic choice for a breakfast on-the-go, too.
You'd be hard-pressed to find a better combination than baked goods with apple and cinnamon. You'll love the way your entire house smells as these AIP muffins are baking!
Your ingredient list contains quite a few things you likely have already in your cupboard, so be sure to check before making your shopping list.
Here's what you'll need:
I thought I should give a couple of helpful hints on the list above. I wouldn't recommend trying to substitute the cassava flour, tiger nut flour, or arrowroot flour (which is also sometimes called arrowroot starch). Each of these flours is incredibly unique, and making a change will result in a different finished product.
As far as the gelatin goes, you're only going to want to use unflavored. The flavored gelatins have either sugar in them, or a chemical sugar substitute, neither of which will have good effects on your health.
Finally, I wanted to mention the applesauce. If you don't have a jar of applesauce on hand, it's really easy to make your own from the extra apples that aren't required in the recipe. Just a half a cup is required, so about one apple will suffice. Peel it, dice it, and boil in a small amount of water until softened. Use a handheld blender to turn it into applesauce. Simple and quick!
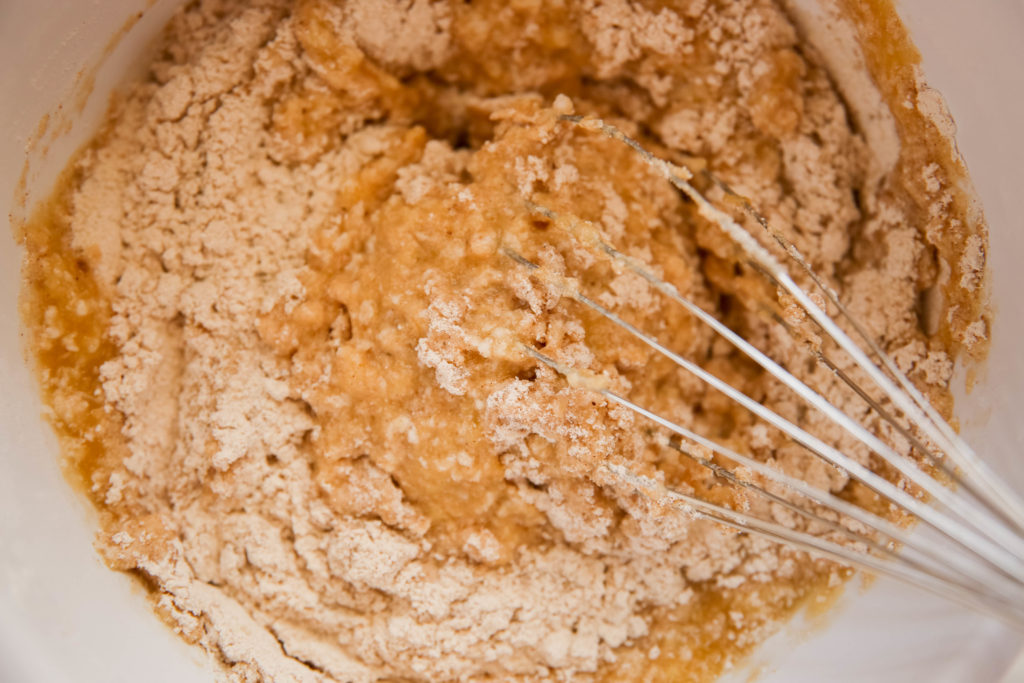
As usual, you'll want to start by gathering all the ingredients. Then, you'll want to add all your dry ingredients to one bowl.

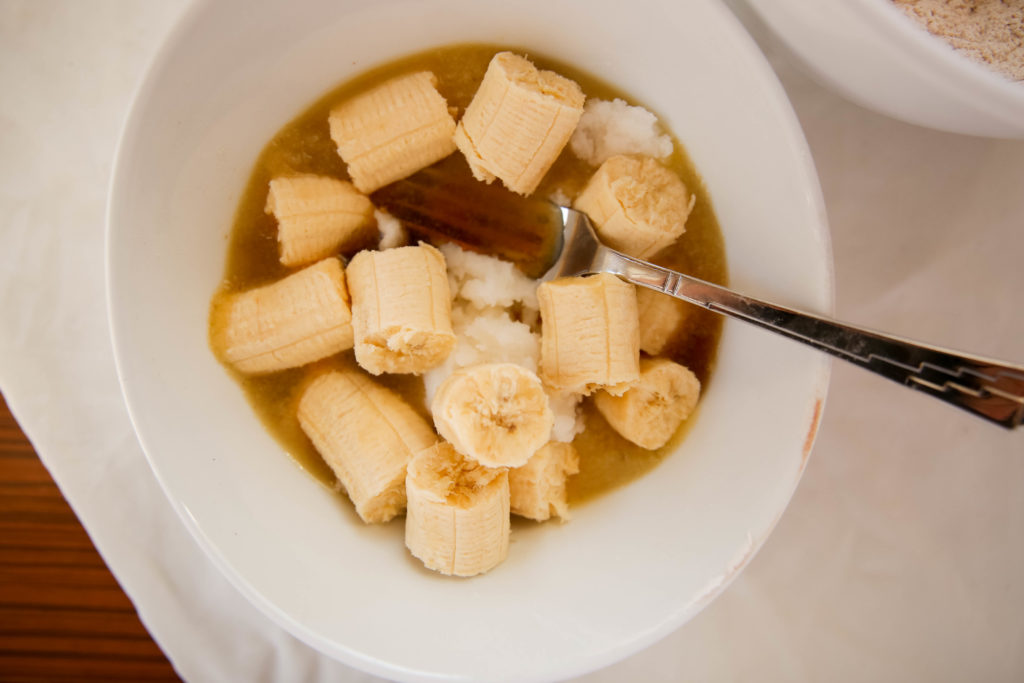
The next step is to get a second bowl and add your wet ingredients to it, mashing the banana as you go.
Next, you're going to combine your wet ingredients with your dry ingredients.
Finally, you're going to fold in the apples. That means to lightly scoop around the bowl until the apples are combined so that you don't overmix.
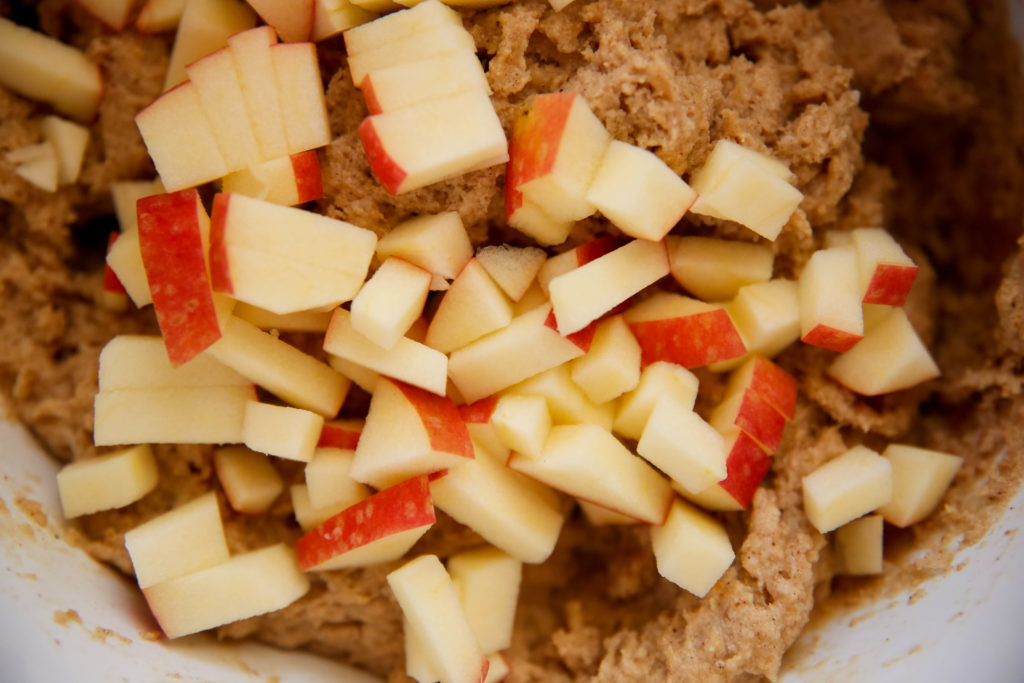
Don't be alarmed if the batter is thick -- that's exactly how it should be at this stage.
You're going to want to carefully spoon the batter into a muffin tin that contains muffin liners. If you don't have liners, be sure to generously grease each cup with coconut oil.
Finally, top each muffin with a sprinkle of coconut sugar.
You can use mini muffins or regular-sized muffins in this recipe. The baking time, however, will be different for each. With regular-sized muffins, you'll need to bake them for about 35 minutes. For mini-muffins, the time required will be shorter, about 25 minutes.
Because baking time can vary greatly with each oven, you'll want to use a toothpick to test the doneness of the muffins as they get close to finishing time. If the toothpick comes out clean, the muffins are ready to be taken out. But if the toothpick comes out with batter on it, they're not quite done yet.
This recipe is for gluten-free, dairy-free apple cinnamon muffins. If you're looking for AIP banana muffins, these will also fit the bill. AIP and Paleo, they're suitable for people who have a range of dietary restrictions.
This recipe is for a sweet, gluten-free apple crumble muffin. There is sweetness from the bananas, the applesauce, the apples, and the maple syrup. Plus, the sprinkle of coconut sugar on top will give a little extra touch of sweetness!
This is a common question for many people who aren't too familiar with eating AIP or Paleo. In most cases, baking soda is gluten free. But not all! That's why it's so important to read your labels. I recommend a brand like Bob's Red Mill that is always gluten-free.
Tiger nut flour is made out of tiger nuts, as you could probably guess. Most people have never heard of tiger nuts. But thousands of years ago, they made up a huge part of the diet of humans. The reason that tiger nuts are AIP compliant is that they are actually NOT nuts -- they're tubers, just like a sweet potato!
If you want to learn more about the benefits of tiger nuts, this is a great article for you to read.
Ready to get started? Here is the full list of ingredients and directions.
Happy eating!
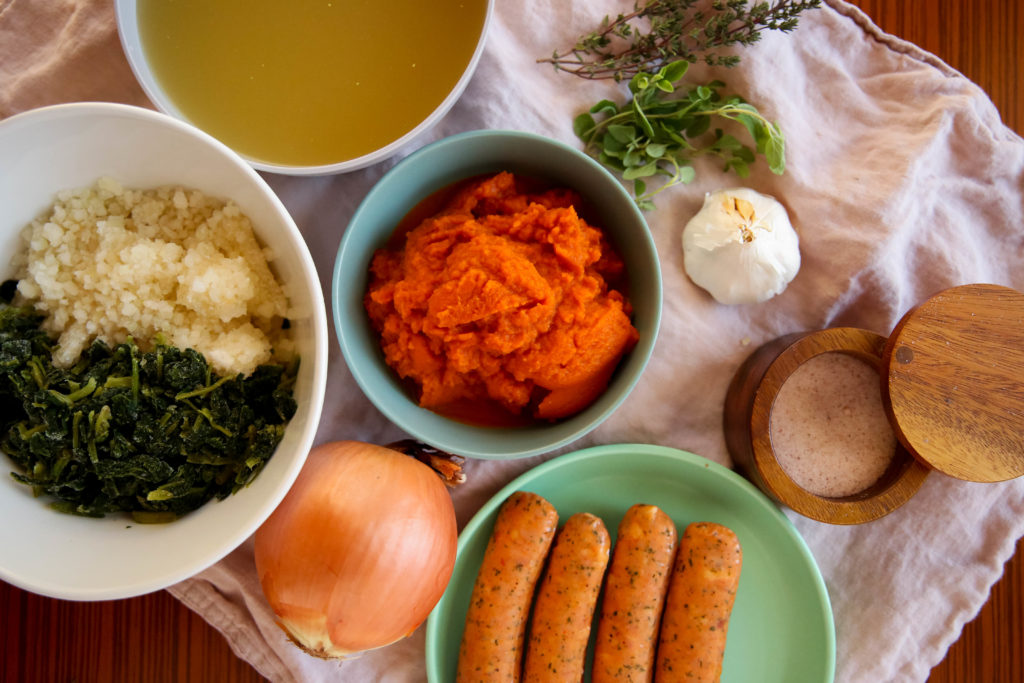
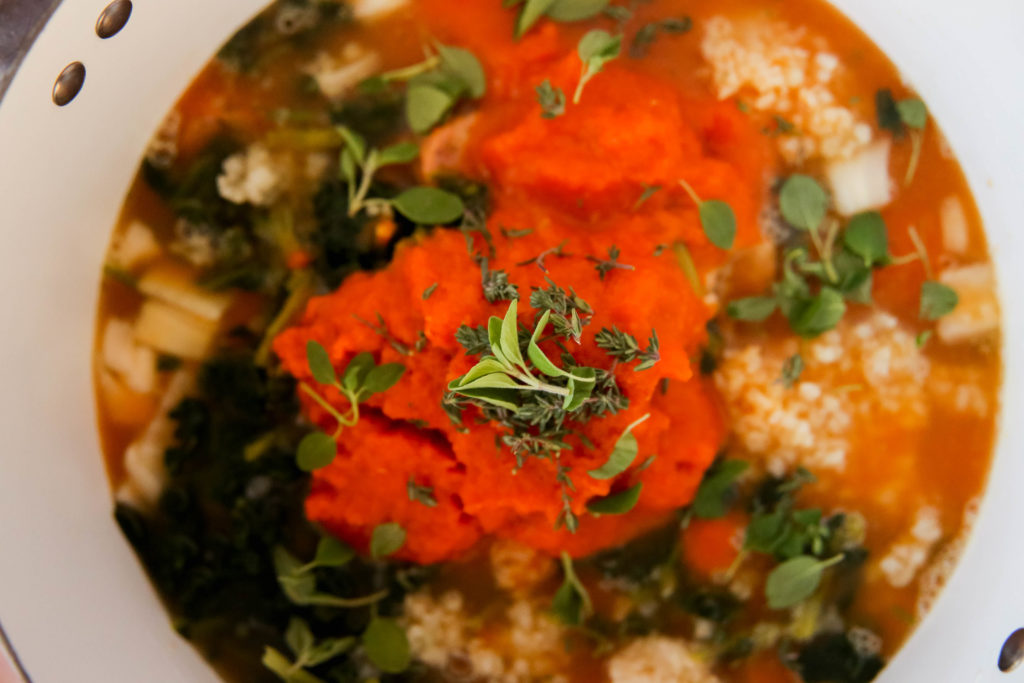
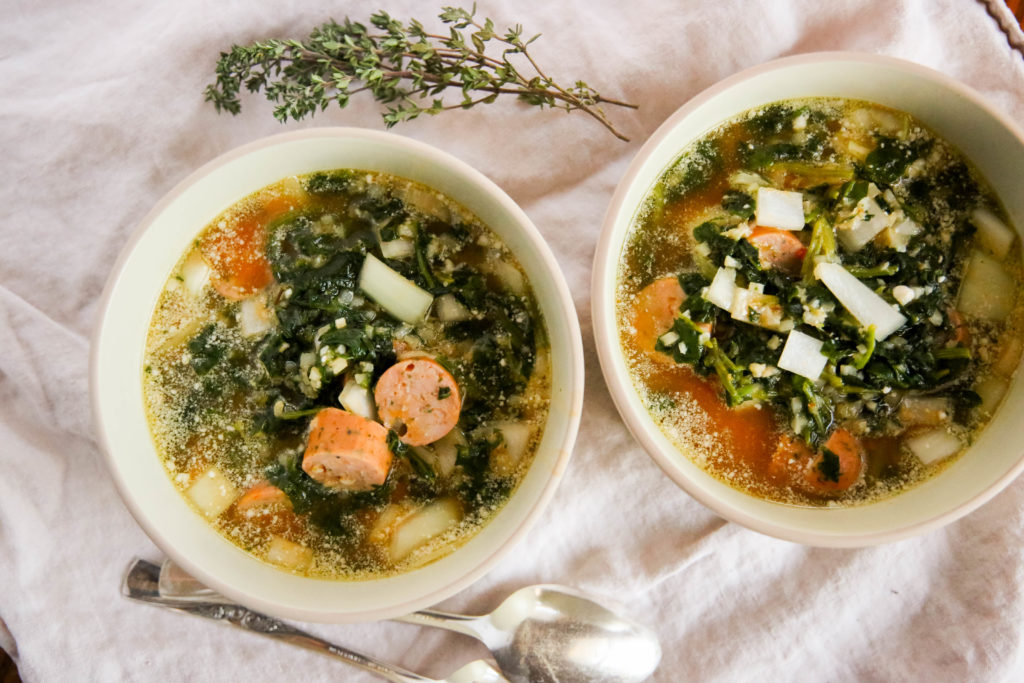
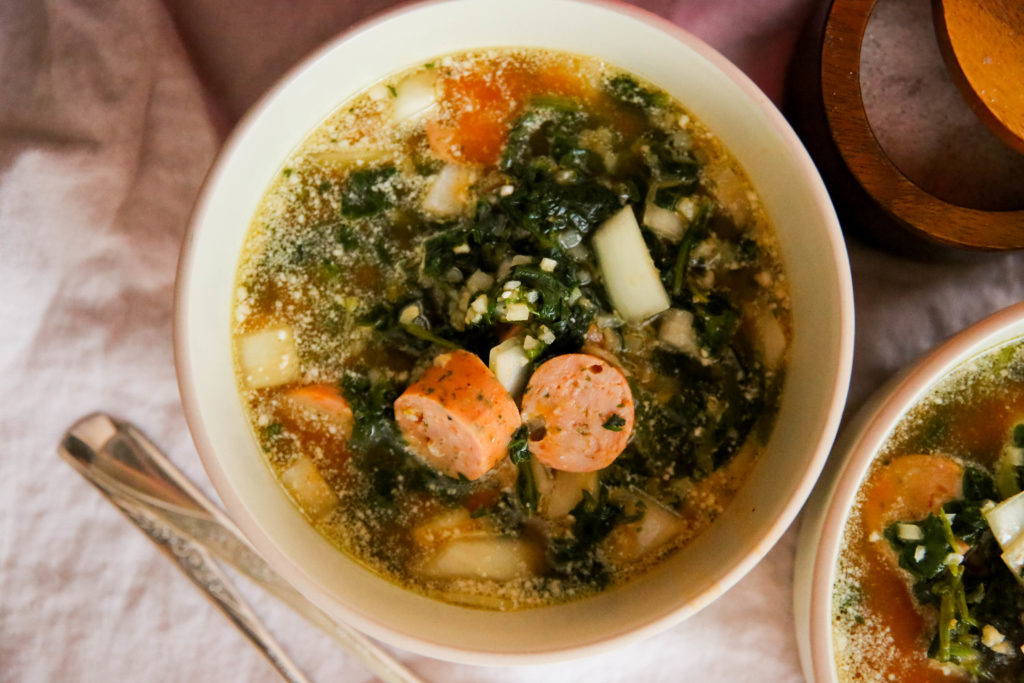
Need a warming dish that won't involve cooking all day? This pumpkin soup with sausage is a great choice. It's packed with nutrients (including spinach that gives the soup more texture and makes it even healthier), has plenty of protein, and is incredibly filling.
The sausage can even be omitted to become a vegetarian pumpkin soup, if you prefer. You could even prepare it without the sausage, scoop out a bowl of meat-free, hearty soup, then add the sausage back in for those who want it.
An extra dose of nutrients comes from the use of cauliflower rice. Soups with cauliflower rice are becoming increasingly popular, and this is one that will fit the bill if that's what you're looking for.
I bet you have quite a few of the ingredients for this pumpkin soup with sausage already in your pantry.
Here is the full list of ingredients you'll need for this soup:
The first thing you'll do is gather the ingredients, all of which are listed above.
Then, you'll grab a large-sized stockpot and put it on medium heat. Add the onion, sausage, and garlic, and stir until the onions become translucent. If you find you need a bit more oil during the process, add a knob of coconut oil or avocado oil.
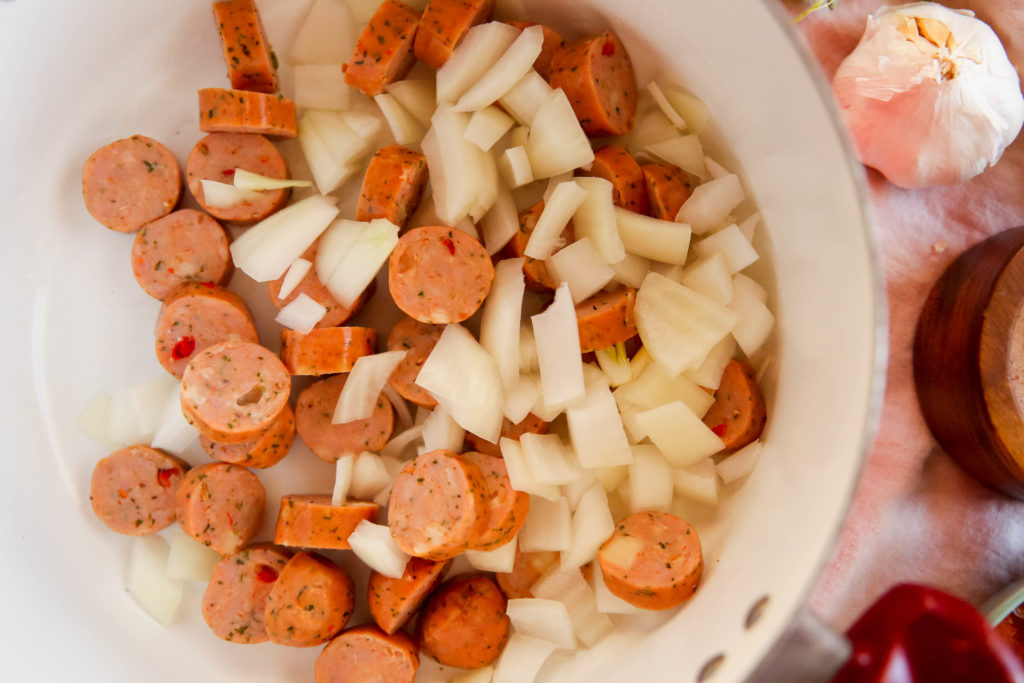
It's going to start to smell great as soon as the onions and garlic start frying!
Give it all a good stir, then reduce the heat so the paleo pumpkin soup is brought down to a simmer.
You're basically done at this point. Pretty simple, right? You'll want to check on that simmer every now and again to be sure the heat isn't too high.
But otherwise, after about 30 minutes of simmering on its own, here's what you'll see:
If you're not eating AIP (autoimmune protocol), then you may already have a favorite chicken sausage that you have in mind for this soup. Those who would like to be AIP compliant, I'd advise you to read the label on the sausage pretty closely. Even the ones that are labeled things like "all-natural" can have additives you wouldn't necessarily expect.
You don't absolutely have to use bone broth in this soup. A regular chicken broth would work, too (although this is another item on the shelf that often has crazy amounts of unnecessary additives, so read the labels!). The reason I recommend bone broth is because it has so many healing properties. If you want to find out more about it, check out this video at about the two-minute mark.
It's fairly simple to make your own bone broth, too. Want to see a chicken bone broth recipe? You can find a great one here if you're just getting started and want to know more. You can make a super tasty chicken dish, then use all the leftover parts of your chicken to make the bone broth. Way better than wasting so much of the chicken, right?
Yes! Eating paleo means that you don't eat any dairy, grains, or legumes. It's eating just like our ancient ancestors did, with a focus on nutrient-dense foods. This page has a great overview of the paleo lifestyle, if you're interested in learning more. This paleo pumpkin soup will be a hit for anyone, no matter what their dietary restrictions may be, but it's definitely suitable for those eating paleo.
If you're looking for a dairy-free pumpkin sausage soup, this is the right recipe for you. A lot of soups are made more filling by adding cream, milk, or another form of dairy. But this soup is plenty filling, thanks to the combination of pumpkin puree, cauliflower rice, spinach, and sausage. Just think of all the nutrients included in that list!
Yes, absolutely. You could omit the sausage and make this recipe a pumpkin kale soup instead. It'll still be tasty and full of nutrients. Make it without the sausage, scoop out the desired amount for the vegetarian you're serving, then add the sausage in for the others who prefer to have the protein-laden version.
Yes, absolutely. If dried is what you have on hand, then you'll want to reduce the amount you're using. Dried herbs are more concentrated than fresh. Try just a bit, then taste the soup after it's simmered. Add more if desired.
Ready for the full paleo pumpkin soup recipe? The ingredient list isn't very long, and the directions take just a couple of easy steps. Here it all is:
I hope you enjoy this one!
When people make a lifestyle change that involves their eating habits, they often struggle with what to make for breakfast. That's what today's recipe is all about. It is for blueberry AIP Paleo breakfast bars that are meant to simplify your morning.
I get why breakfast is tough; the Standard American Diet (let me mention, it's no coincidence that it's abbreviated SAD) tells us to eat grains, grains, and more grains. But these grains are so irritating to our gut. So drop the cereal and toast routine, because it's setting you on a blood sugar roller coaster for the entire day. These blueberry AIP Paleo breakfast bars are a far better choice!
If you want yet another breakfast idea, I wrote another blog recently showing exactly what I like to make in the mornings, which you can find HERE.
And if you're interested in learning more about what I think Americans need to change about their health -- and specifically, my top 4 tips to do so -- you can find that blog post on my site, too.
These healthy blueberry pie bars aren't just for breakfast, though. They're great when you want a sweet treat any time of day. So, let's get into each step involved in creating these tasty bars!
First, you're going to gather your ingredients for your blueberry crumble bars:
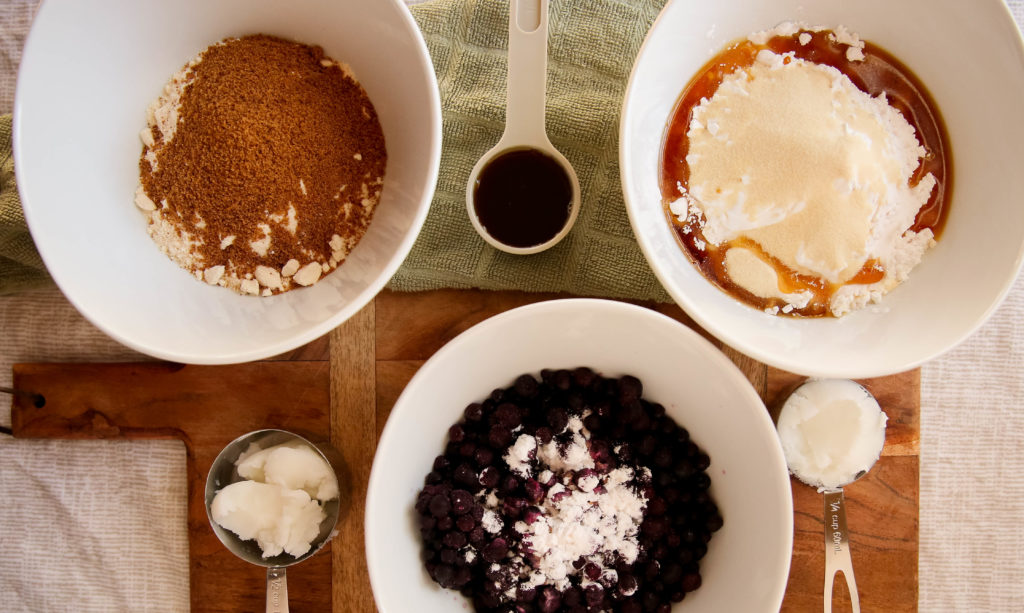
It'll be easiest to have three separate bowls here. One is for the crust ingredients. The second is for the filling ingredients. And, as you can probably guess, the blueberry crumble topping will be in the third bowl.
When your crust is mixed up for these paleo breakfast bars, you'll want to press it into an 8x8 pan. Line it with parchment paper first, which makes it so much easier to remove the bars and clean up the pan later. Press it down with your fingers until the thickness is even. Then, bake for 5 minutes to allow the crust to set.
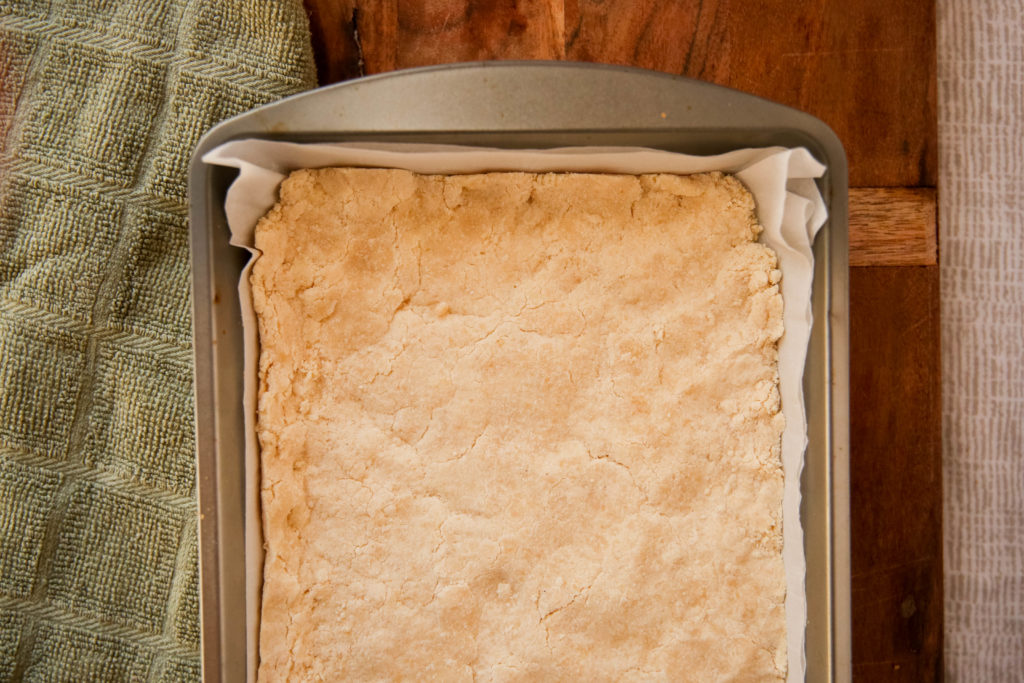
It'll look about like the picture above when you take it out.
Next, you're going to spoon the filling over the baked crust, gently spreading it out evenly.
Finally, follow it up with the contents of the bowl you mixed the blueberry crumble bar topping in.
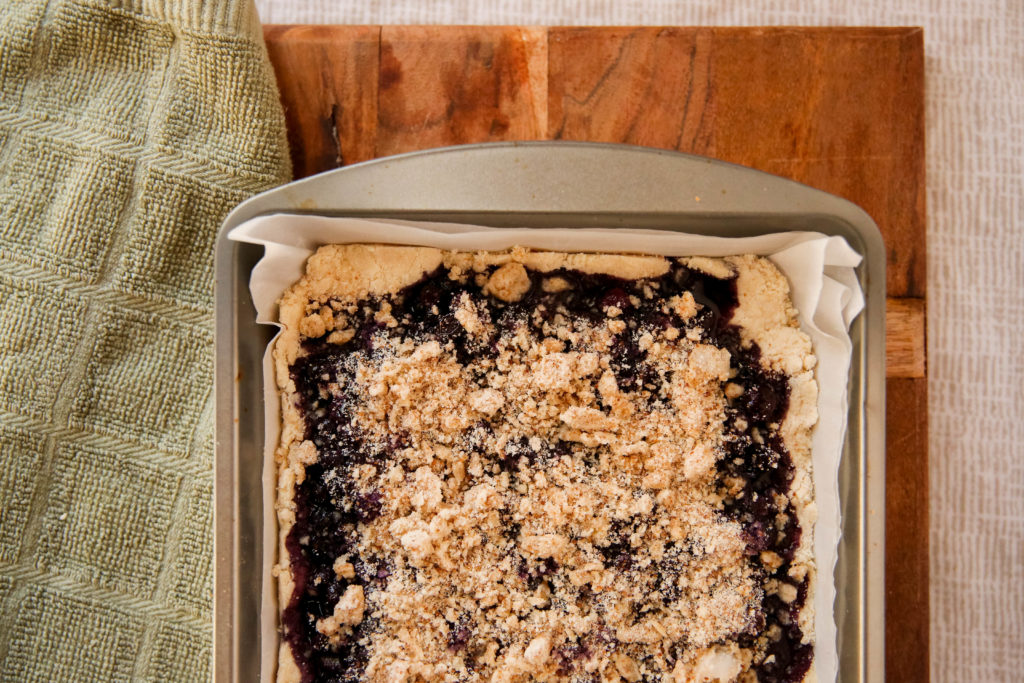
The last step in the process is to let all these layers of goodness get baked together.
That'll take about 25-30 minutes, so you can get all your cleanup easily completed in that window of time. Nobody likes a messy kitchen!
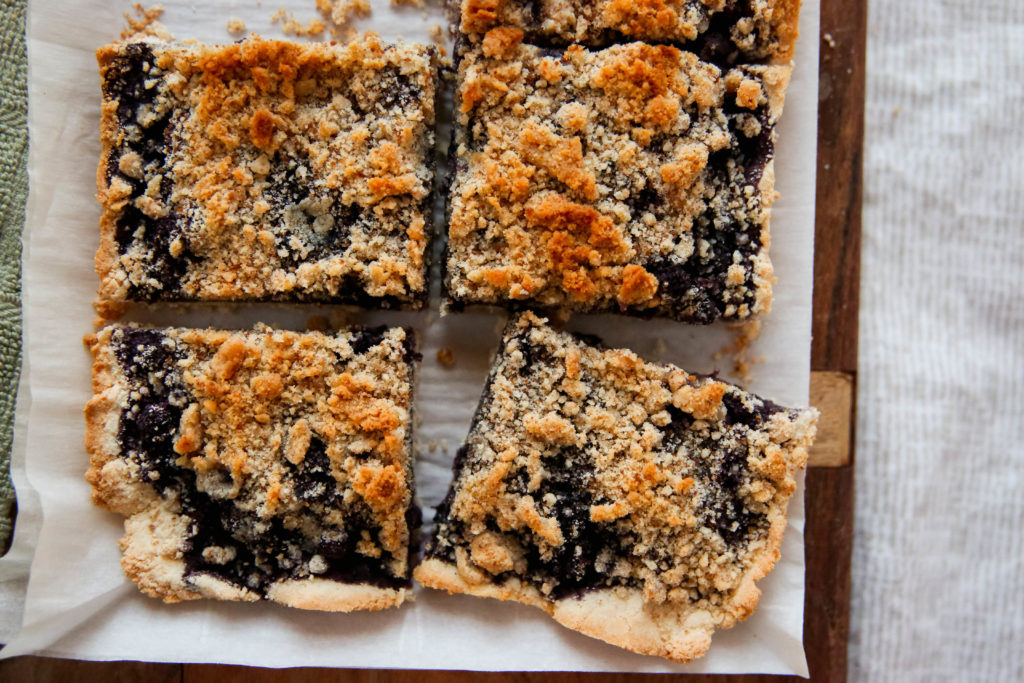
After they've baked, you'll have to let the bars cool a little, which I know isn't easy. Here's what you'll be looking at:

Let's get to some common questions about these blueberry crumble bars.
There is no added sugar contained in this blueberry crumble bar recipe. It gets sweetness from maple syrup and coconut sugar, which are far better sweetener alternatives than the sugar on the typical grocery store shelves. Be certain that the maple syrup you're buying is 100% maple syrup and not loaded with added sugars. And if you're interested in learning more about which sugar substitutes aren't that great of choices, please check out this YouTube video I made.
Since there is no processed sugar or flour, this blueberry breakfast bar is a far better choice to start off your day than your usual grain-filled cereals and toast. And as an added bonus, blueberries are naturally sweet while being low in sugar. They're one of the berries I eat most often.
If you've got company coming but don't want to spend the time they're with you in the kitchen baking, look no further. These paleo breakfast bars can be made at your convenience. Just store them in the fridge to keep them fresh until you need them -- that is, if the bars can last that long! They're an easy DIY breakfast bar that can be enjoyed at any time of day.
Yes, it is! People with dietary restrictions such as dairy-free or gluten-free will enjoy these blueberry AIP Paleo breakfast bars. You don't have to feel concerned about this recipe irritating your gut, either, since there are no grains included.
Here's the full recipe:
Hope you and your family enjoy this one!
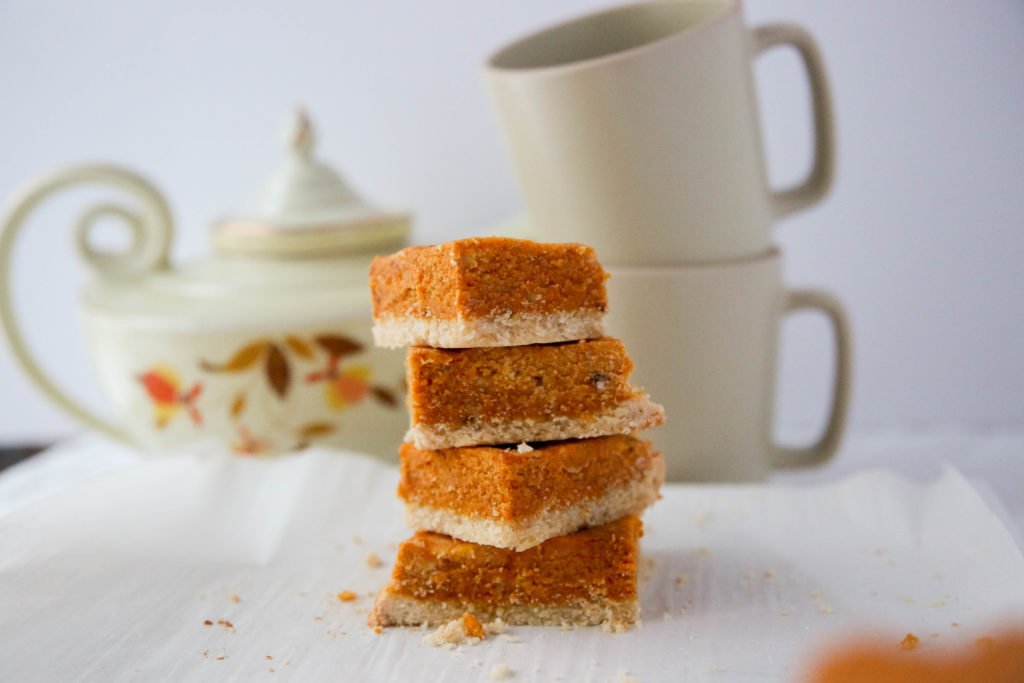
I know; it's not fall. But really, isn't any time of year the right time for AIP pumpkin pie bars?
If you're a fan of pumpkin flavor, this healthy pumpkin pie bars recipe is going to become your fast favorite. It's not going to take you hours of work in the kitchen over a hot stove. And though it has two layers to it, don't let how complicated layer bars can be put you off. This AIP pumpkin bars recipe is pretty darn simple, despite the fact that AIP recipes can often seem complicated, or have a laundry list of ingredients involved.
I'm happy to say that's not the case here.
As usual, the first step to smooth the way is to gather all your ingredients. It'll mean less running around your kitchen, going from the cupboards back to the counter each step of the way.
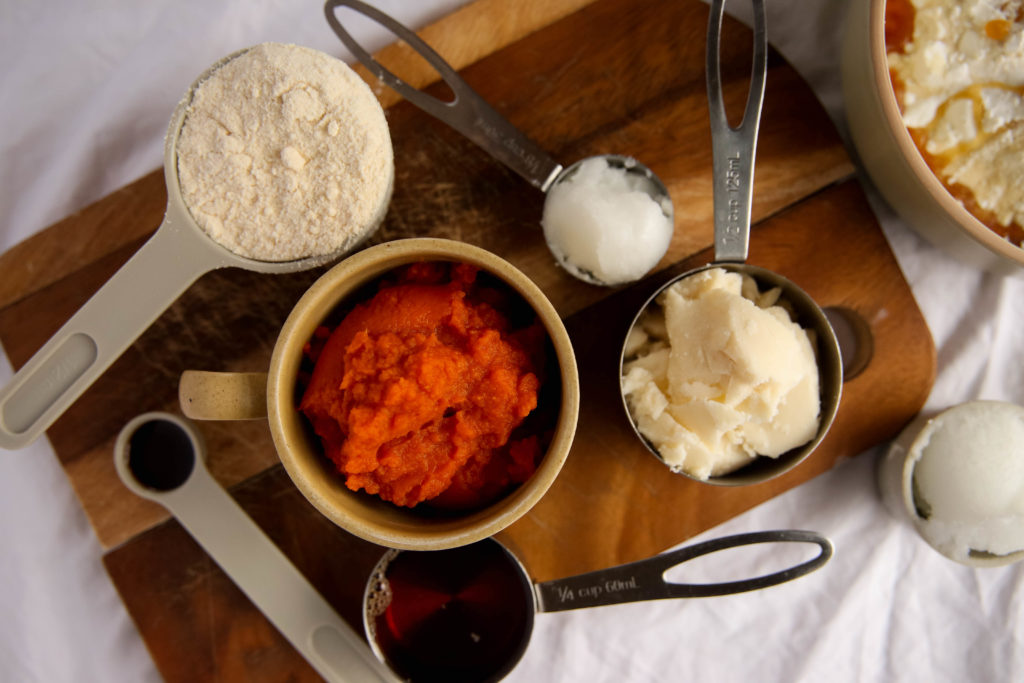
You're going to be working from two bowls here. One will be dedicated to each layer. The first bowl is going to be for your crust, and the second for your filling.
Here's your ingredient list:
First, add all your healthy pumpkin bar crust ingredients to one of the bowls and mix until combined.
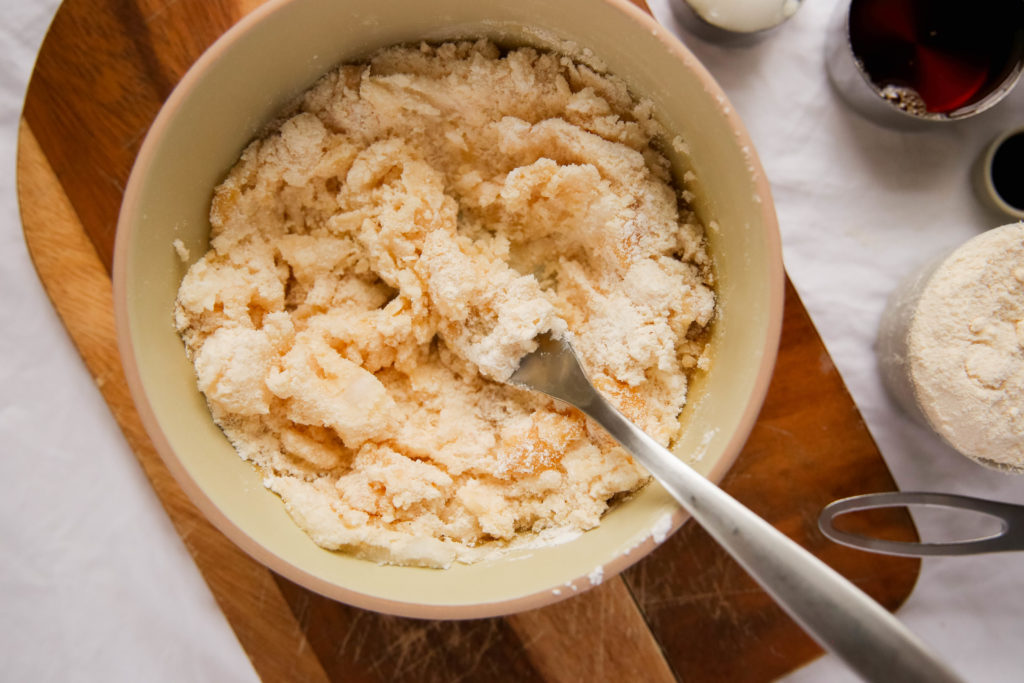
Then, go ahead and set your AIP pumpkin pie crust to the side, because you're going to get another bowl to mix up the delicious filling.
You'll combine the filling in a medium bowl, then set that one aside, too.
Now, it's time to start assembling these two tasty layers. You'll press the crust into an 8x8 baking pan that's been lined with parchment paper. Don't skip the paper, because it'll make the healthy pumpkin pie bars way easier to take out later. You'll save yourself a lot of work after the baking process is over.
Grab the bowl with the crust ingredients that you mixed up first. Press the crust into the baking pan, right on top of the parchment paper.
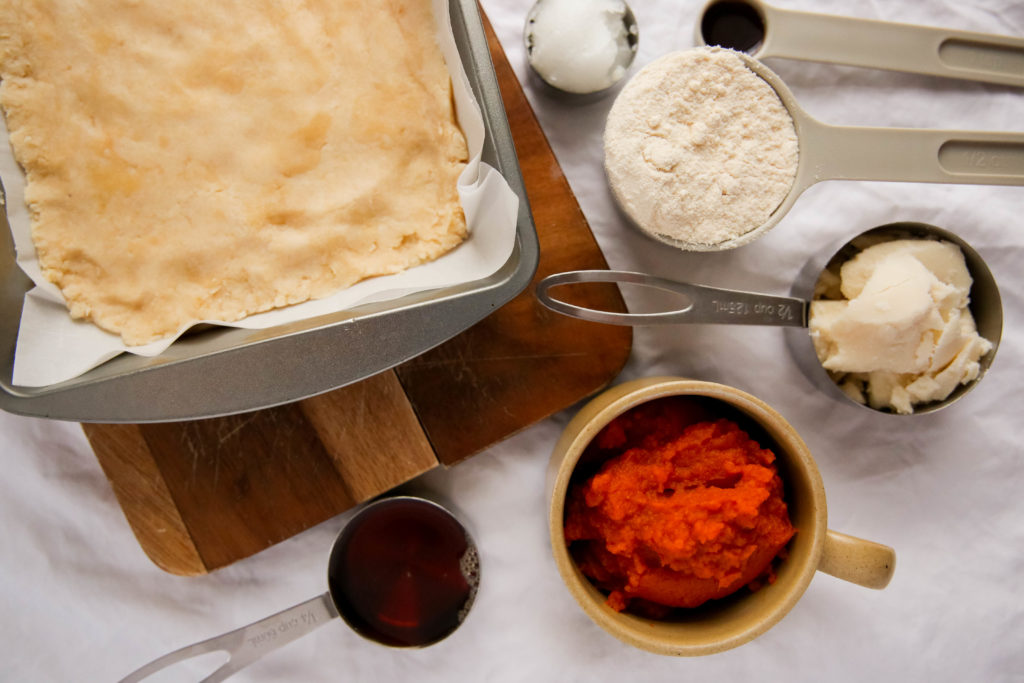
The crust layer of your AIP pumpkin pie bars is going to bake first, allowing it to set before the filling layer is added on top. So, go ahead and bake that for 8-10 minutes.
If you're a planner when it comes to recipes, you may end up mixing the crust first, then getting it in the oven and mixing up the filling ingredients while the crust bakes. It's totally up to you and what feels easiest for you when you're in the kitchen. (If you want my two cents, though, I have a great idea of what you can do while these are in the oven -- it doesn't take long and can help you feel energized and in a positive mindset. I've put a video together HERE for you to learn about it and get a quick how-to guide.)
After your crust layer has baked, you're going to grab the bowl with the filling ingredients in it.
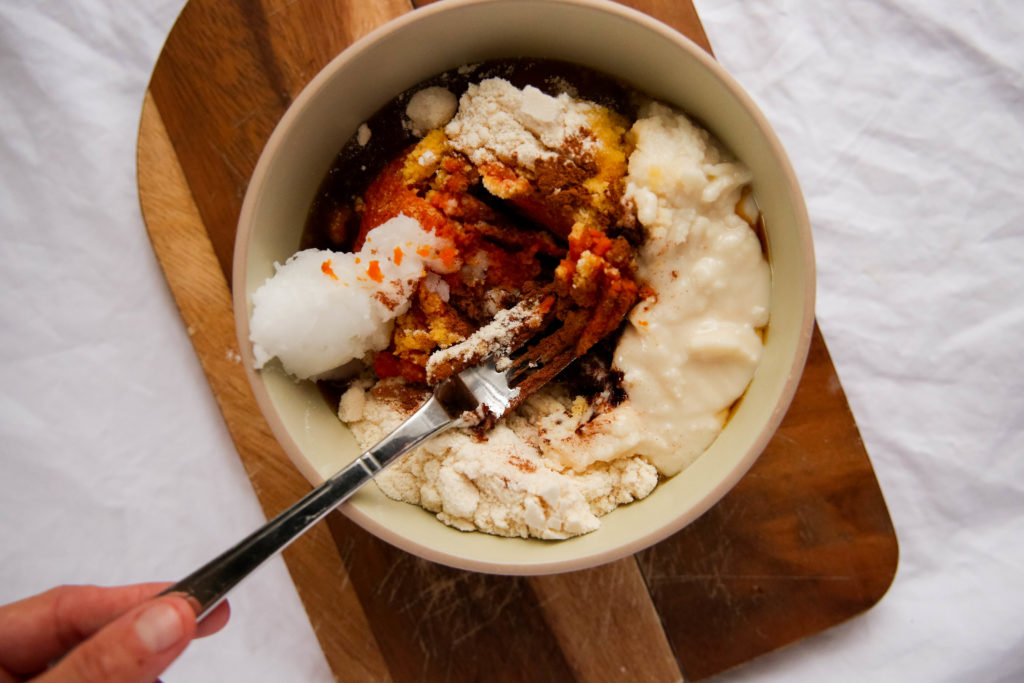
Now, the baking part is actually done. The crust is the only part of this AIP pumpkin pie bar recipe that needs to be baked. Let it cool, then you can layer the filling on from your second mixing bowl. Smooth it out to be uniform thickness over the crust.
Finally, you're going to place the bars in the fridge or freezer. If you just can't wait to try a healthy pumpkin pie bar, then you're going to want to place it in the freezer, because it will only take 20 minutes to set, compared to 40 minutes if you use your refrigerator.
This is your finished product:
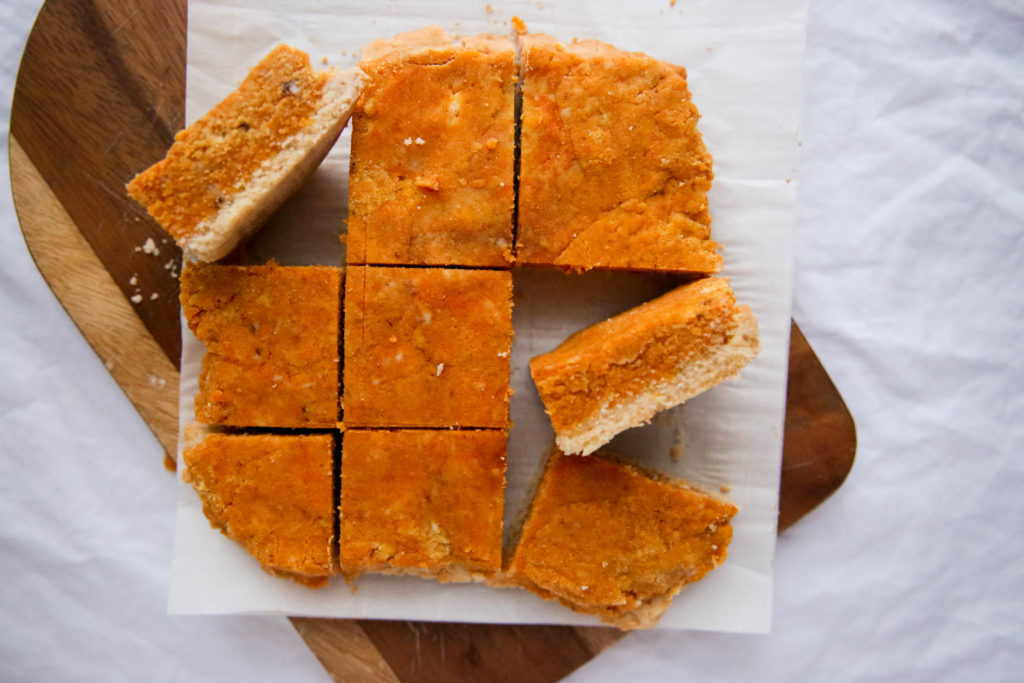
Looks pretty amazing, right?
The color of these AIP pumpkin pie bars is just gorgeous. Who would see these and not want to dig in?
Yes! this recipe is for gluten-free, dairy-free pumpkin pie bars. People with dietary restrictions and those without any dietary restrictions are both going to love them. You could call these healthy pumpkin pie bars a real crowd-pleaser that your whole family will enjoy trying out.
You've gotta have a sweet taste to make a good pumpkin pie bar, right? But you don't need the refined, processed sugars that are like poison to our bodies. These sugar-free pumpkin pie bars get a sweet touch from the maple syrup that is used in both the crust and the filling layer. In fact, maple syrup is a great substitute for a lot of sweeteners. You'll find plenty of maple syrup baking recipes online. Or try switching it out for another sweetener, like on your oatmeal in the morning, or top your coconut yogurt with a drizzle of it. Just be sure that you are using 100% maple syrup, nothing with added sugars like the syrups you typically find on grocery store shelves.
Let me be totally clear: the typical vanilla extract that you get off the shelf at regular grocery stores is likely not going to be AIP compliant. If you want AIP compliant vanilla extract, then you need to make sure you get a kind that doesn't have alcohol in it. Consider, too, getting a vanilla powder instead of using a liquid vanilla extract. You could also choose a fresh vanilla bean and scrape out the insides to use it.
I hope that clears up most of the common questions that arise when it comes to AIP pumpkin pie bars. Now, let's get to the full recipe!
Crust
Filling
Happy eating!
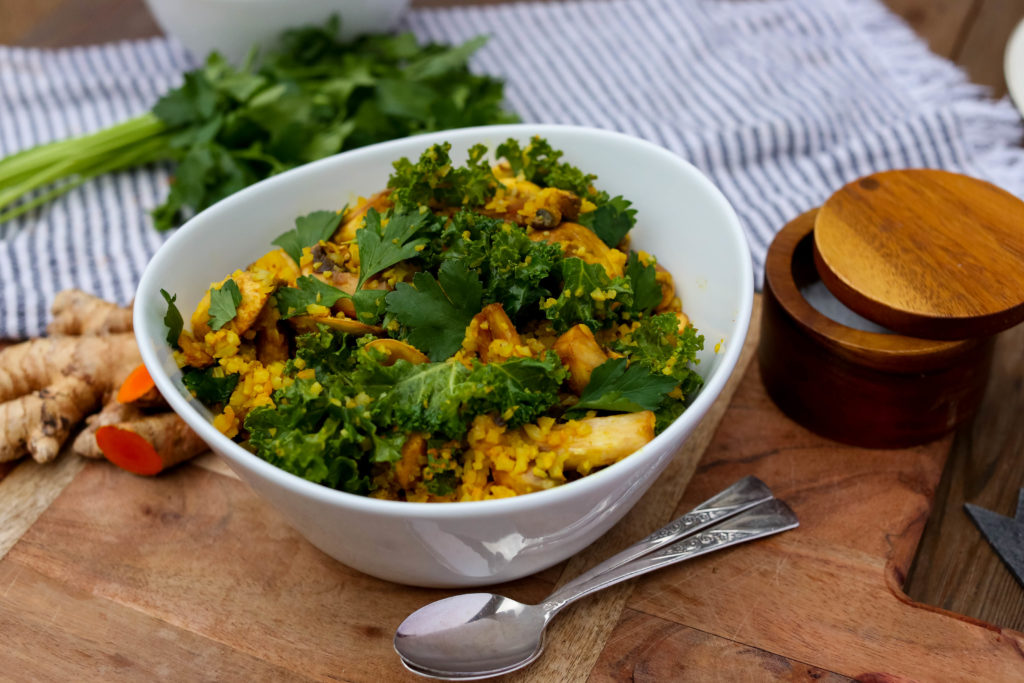
I'm back with another fantastic recipe for you: cauliflower rice mushroom risotto. Now, this is not your traditional risotto, which is made with arborio rice. Instead, it has an AIP compliant recipe twist. A healthier mushroom risotto means that you can enjoy a delicious meal without feeling like you've done your body a disservice. You'll know you're putting good things in and getting the nutrient-dense food you need, instead of the guilt we usually feel after eating something we know isn't a great choice for us.
This cauliflower rice risotto is going to suit a lot of different eating styles: AIP, Paleo, vegetarian, vegan, and certainly anyone who is looking for a delicious meal. If you're searching for frozen cauliflower rice recipes, look no further!
Let's go through the step-by-step process of this healthy mushroom risotto.
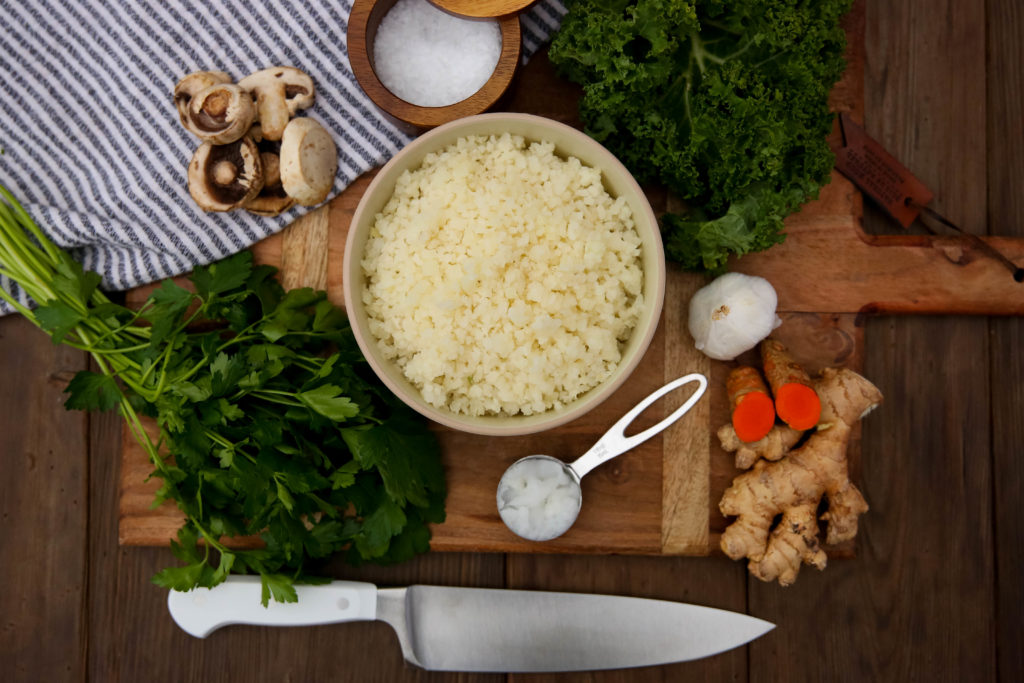
As always, you'll begin with gathering your ingredients: cauliflower rice, coconut oil, sliced mushrooms, garlic, ginger, turmeric, kale, parsley, and salt.
Add the coconut oil to your pan, then throw in the cauliflower rice, mushrooms, garlic, ginger, turmeric, and salt. You're going to saute that for about 7-10 minutes. Meanwhile, your house is going to start to smell amazing, and everyone will start asking, "What are you cooking?"
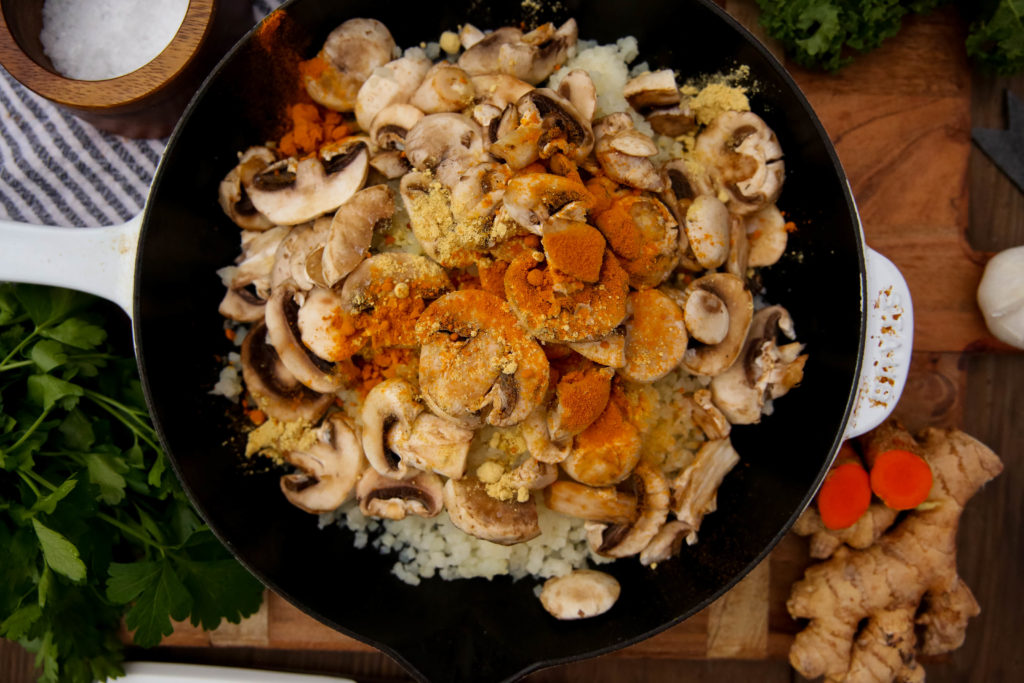
Looks pretty amazing, right? Now, you're going to want to eyeball things and maybe even give it a taste. If you think it needs more ginger, garlic, or turmeric, go ahead and add it. And salt, too, for that matter -- I am a big fan of pink Himalayan sea salt myself, and I tend to be pretty generous with that.
Next, you'll toss in your parlsey and kale.
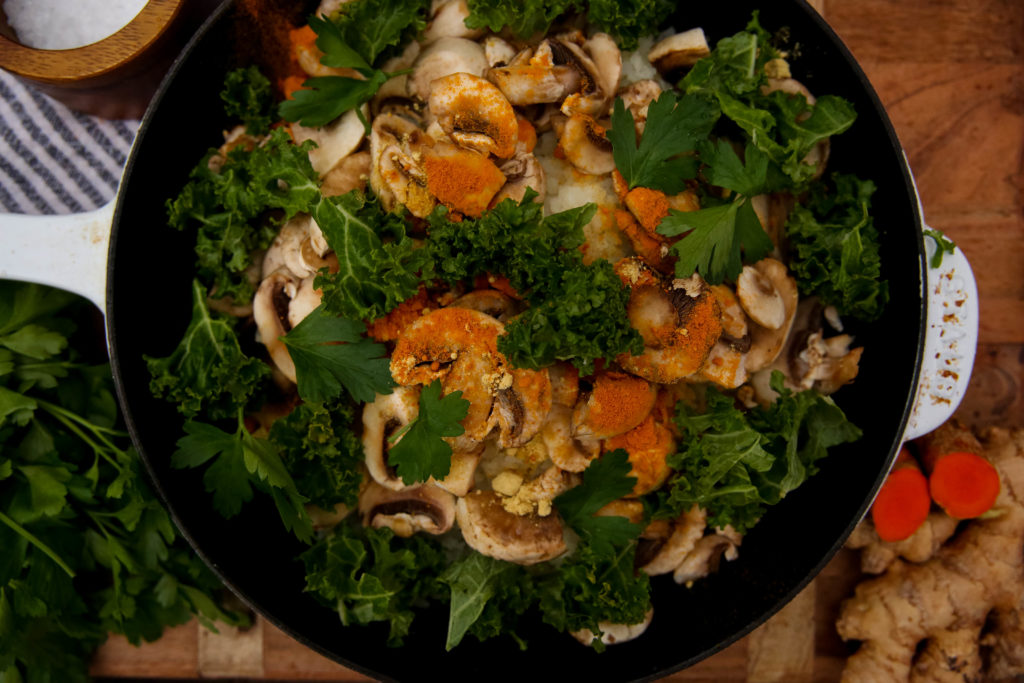
Once everything is in the pot, give it a good stir and let it all hang out together for a few minutes. The flavors will meld and everything will get combined. The kale will have a chance to wilt a bit, which makes it easier to chew and enjoy.
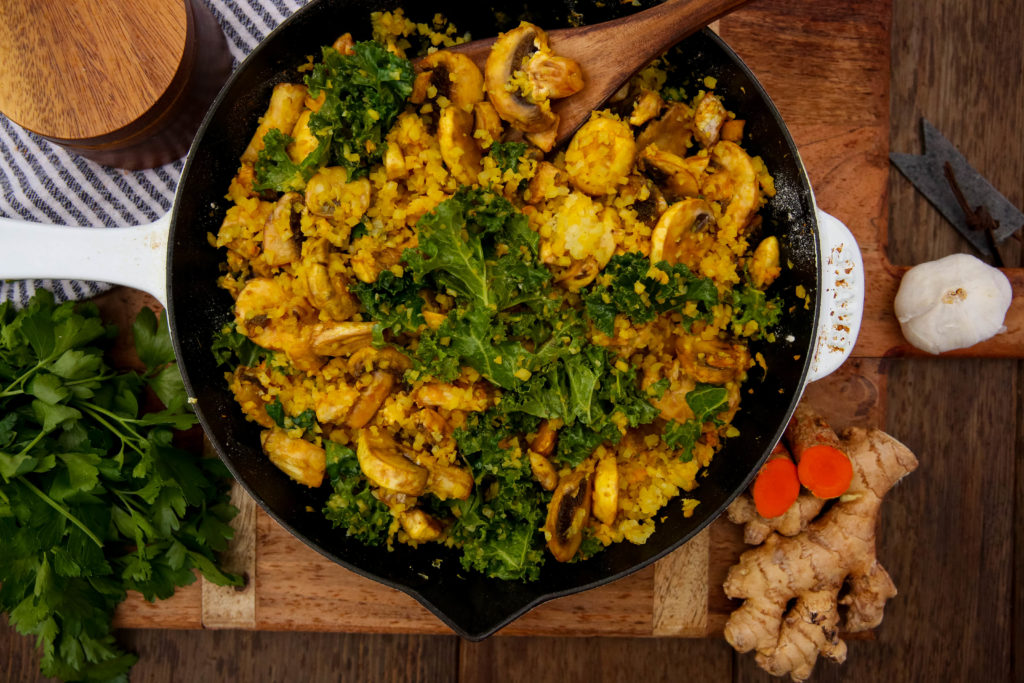
You can serve it right from the pan. This is a quick risotto, so if you're looking for fast and healthy dinner ideas that won't take long to get on the table, this is going to be perfect.
If you're looking for a wild mushroom barley risotto, you're in luck. You can absolutely switch out the cauliflower rice with a grain, if you know you tolerate it.
I'm not big on grains for a couple of different reasons. First, the pesticides used on grains are so detrimental. And grains aren't always well-tolerated in the gut, either. So that's why I chose cauliflower rice for this recipe. You could do a barley wild mushroom risotto, or even use arborio rice like would be used in a traditional risotto recipe. These grains won't have the quick cooking time as a frozen cauliflower rice, however, so just be aware of that!
Yes! Many people choose a keto style of eating, which involves having very few carbohydrates. This recipe is a keto cauliflower rice mushroom risotto. If you're eating keto, you can absolutely make and enjoy this dish without having to worry about it being full of unwanted carbohydrates. Interested in finding out more about keto eating? Check out this article.
I'd say that this healthy mushroom risotto recipe is pretty flexible. You could definitely switch it up and do a cauliflower rice risotto with asparagus and mushroom, for one. Or prepare some veggies of your choice beforehand and add them in for a roasted vegetable risotto. Consider adding a protein for a chicken vegetable risotto. The possibilities are seemingly countless, if you have a little creativity...or some extra things in the refrigerator you'd like to use up!
Yes! This recipe is appropriate for anyone who is eating autoimmune protocol paleo. It is dairy-free, gluten-free, soy-free, and doesn't involve ingredients that are typically found to be allergens. This healthy mushroom risotto can be made with any additional ingredients that are suited to your preferences, too. With cauliflower rice, mushrooms, and kale, it's truly a powerhouse of nutrient density.
Interested in the full recipe? Here it is!
That's it -- a super easy, tasty, and nutritious meal can be on the table in about 15 minutes.
Enjoy!
I'm excited to share another recipe with everyone: shepherd's pie with ground turkey!
It's a great choice for dinner, and pretty simple to make.
Shepherd's pie is a classic dish from England. It's also commonly referred to as cottage pie, though there are slight differences in the original recipes for each. So if you've had either before and enjoyed it, then this recipe is going to be perfect for you. If you're searching for a savory sweet potato pie-type recipe, then you're in luck. The sweet potato topping in this recipe substitutes for what is traditionally a white potato topping -- giving this healthy shepherd's pie an extra nutritional bang for your buck.
Unlike your typical shepherd's pie recipe, this is a ground turkey shepherd's pie recipe. Most shepherd's pie recipes are made with ground beef. When you want to switch it up with a different meat to get in your protein, this shepherd's pie with ground turkey will be perfect.
So, let's get into it!
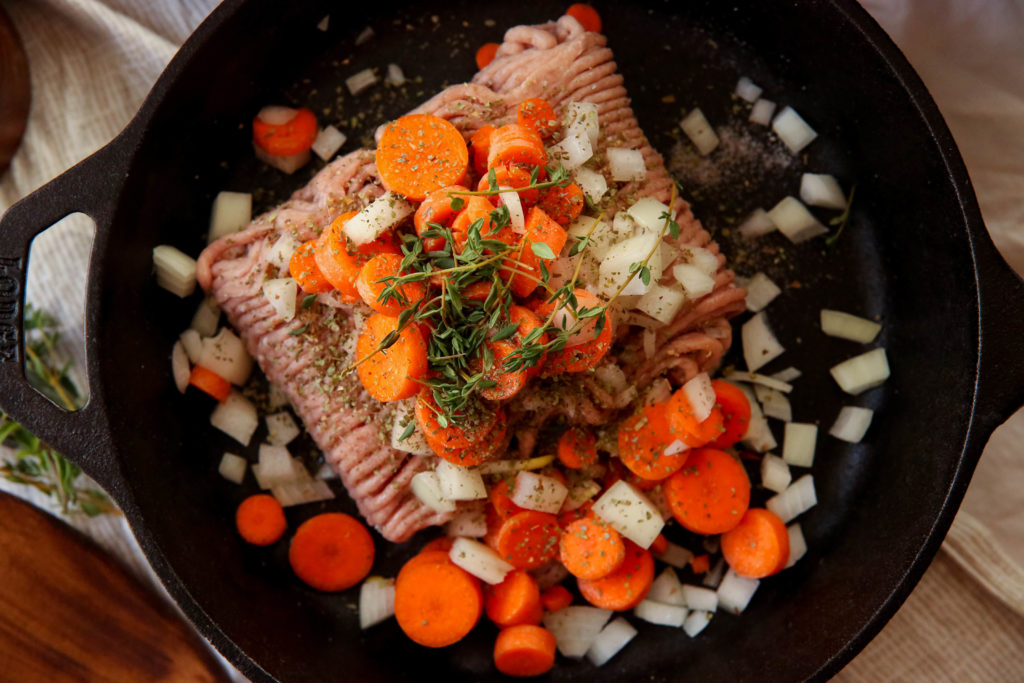
Your first step in creating a healthy shepherd's pie is to gather all your ingredients. This recipe for shepherd's pie with ground turkey doesn't have a laundry list of ingredients, which is nice for those of us who don't want to spend too long in the kitchen!
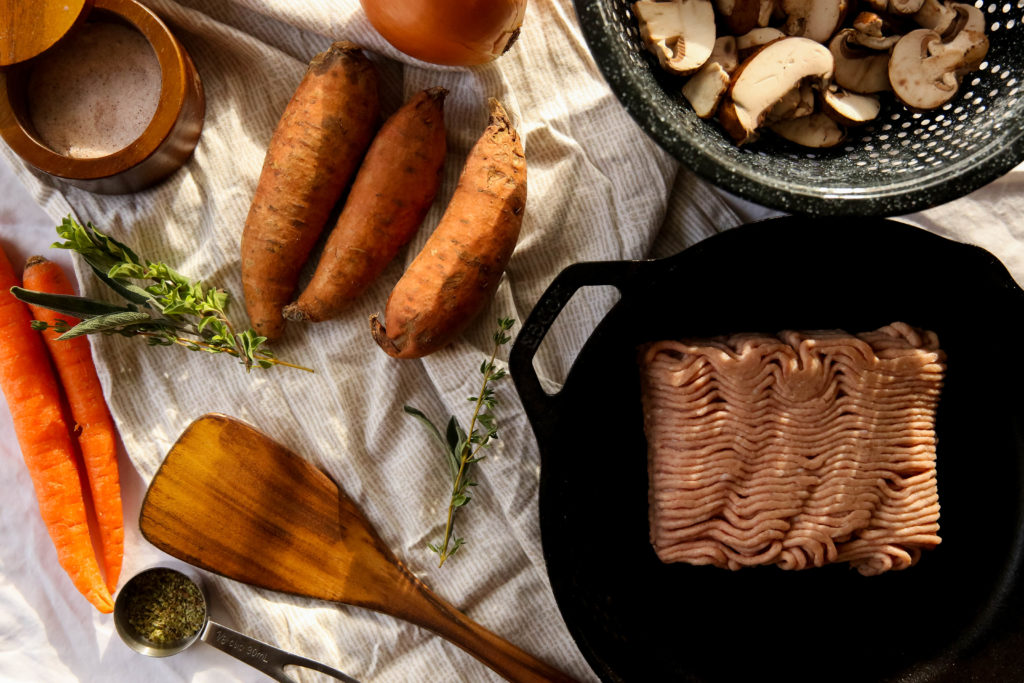
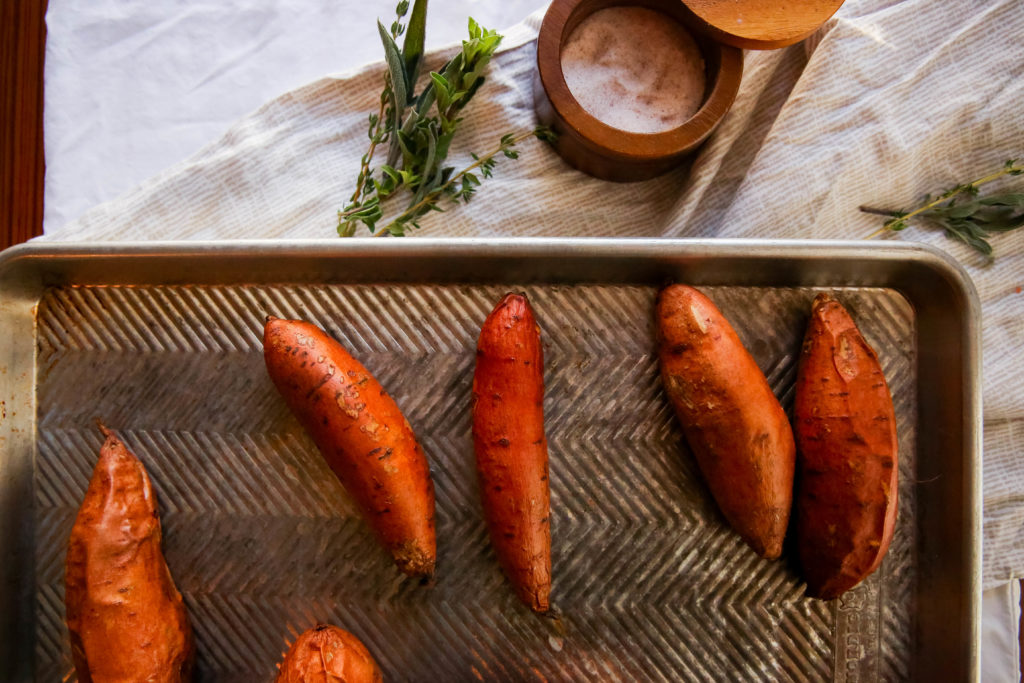
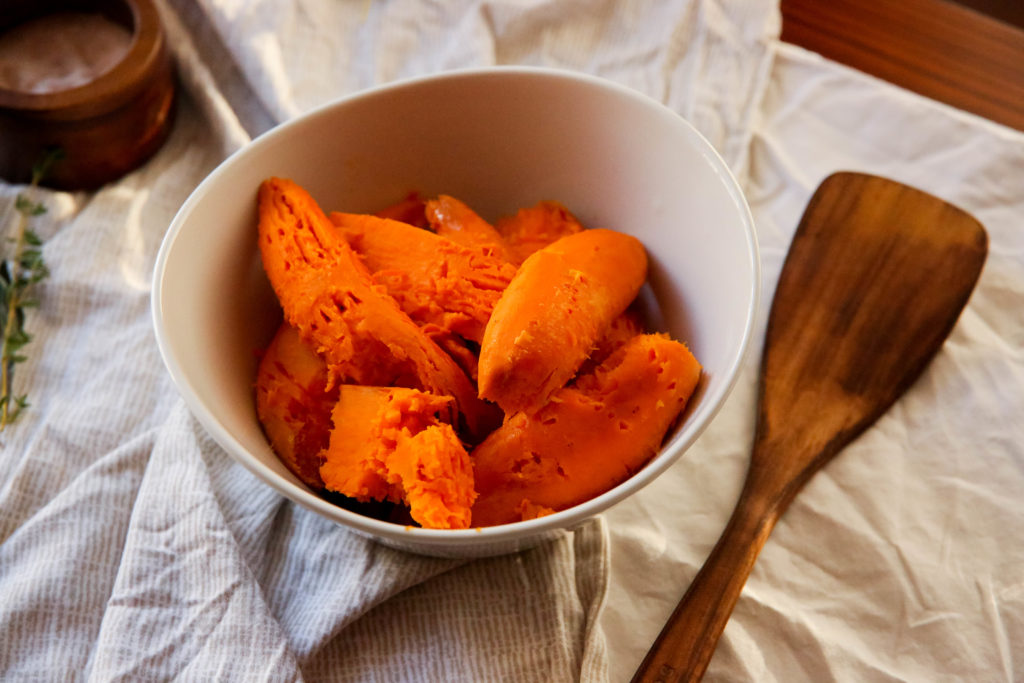
Next, prep your sweet potatoes. Preheat your oven to 375° Fahrenheit, making sure it's ready for your finished product to cook at the end. Halve the sweet potatoes lengthwise, then rub with coconut oil. You don't have to skin sweet potatoes -- the skin will easily peel off after they've been roasted! Place the sweet potatoes with the flesh-side down on the cookie sheet, then place in the oven. Bake for about 30 minutes, or until you test them with a fork and find them tender.
While the sweet potatoes bake, it's time to get the rest of your gluten-free and dairy-free shepherd's pie ready. For this, you're going to want an oven-safe pan, such as a cast iron. You'll cook in this and then put it right into the oven to finish, which means less dishes to wash later!
Chop carrots, onion, and mushrooms (or you can even buy sliced mushrooms, as I did for my version, which cuts down on your prep time!). Add the carrots and onion to a medium-sized pan along with the ground turkey. Turn on medium-low heat, and use a spatula to break up the ground turkey as it cooks. Toss in your salt, sage, oregano, and thyme, and let it all simmer together.
The veggies will absorb flavor from the turkey and herbs as they cook and soften.
You'll cook this wonderful combination of ingredients for about 10 minutes in total. Then, throw in your sliced mushrooms, allowing them to soften up for about 5 more minutes.
At this point, it's time for a taste test. Make sure you like all the balance of flavors and seasoning in your shepherd's pie with ground turkey, adding any more as to your preferences.
Now, it's time to take your sweet potatoes out of the oven. When you do, crank the heat up to 425° Fahrenheit, because that's the heat level you'll need when it's time to bake your ground turkey shepherd's pie.
When sweet potatoes are cooked, the skin becomes pretty easy to remove. Place all the peeled sweet potatoes in a bowl. Use a fork or mixer to whip the potatoes up, adding salt to your taste.
You're in the home stretch now!
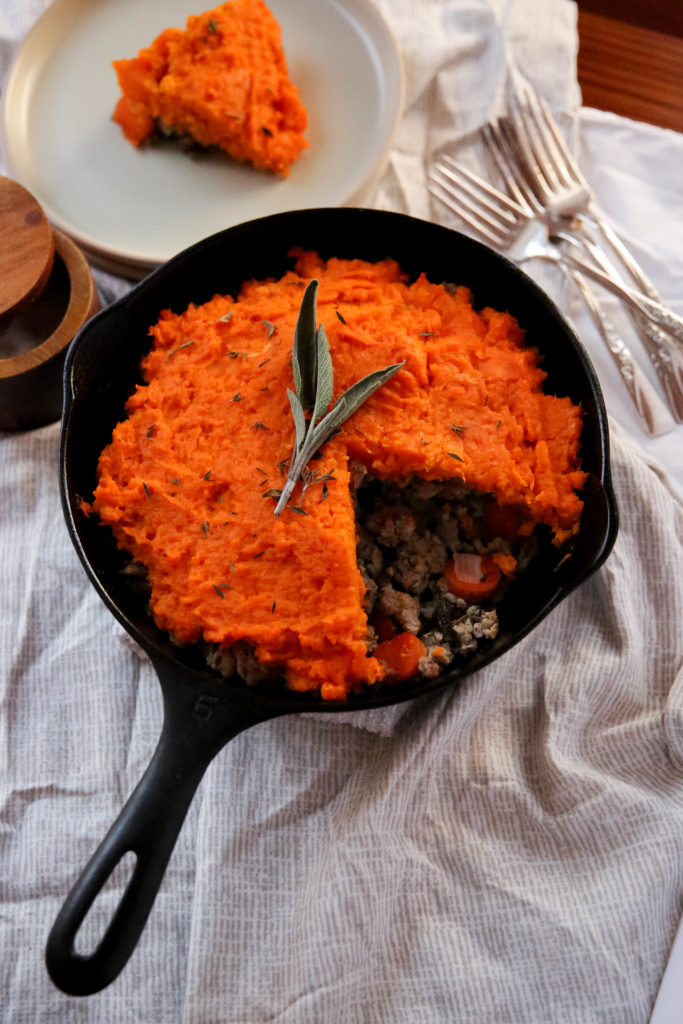
Gently spread your mashed sweet potatoes over the mixture that's in your skillet. Don't worry too much about getting it perfectly even, but spread it as well as you can. You can think of the sweet potato as a top that will keep everything under it tender and juicy as it bakes in the oven, letting all the flavors meld together.
Bake for 10 minutes at your new, higher oven temperature, then remove and serve!
Yes! Though I can't speak to all recipes, this recipe for ground turkey shepherd's pie is gluten-free. If you find you're sensitive to gluten (and far too many people are these days, trust me) then this is a safe recipe to follow.
Yes! This recipe for shepherd's pie with ground turkey is dairy-free. It's also a paleo shepherd's pie, so it's a great choice for those of you who follow the paleo style of eating.
Leftover turkey sweet potato shepherd's pie sounds tasty, doesn't it? And I get it -- when you make a turkey, you've got tons of leftovers you need to use. You can definitely switch out the ground turkey for some turkey leftovers in this recipe. You'll want to change things up slightly, however: don't add the turkey to the skillet of vegetables until the very end, because you wouldn't want your turkey to dry out. Be sure you add some coconut or avocado oil to the pan before you put the vegetables in, so they have something to soften in while you cook them.
In my recipe for shepherd's pie using ground turkey, we're making some pretty healthy switches to a traditional recipe. Turkey is a nutritious form of protein that is heart-friendly. This shepherd's pie is gluten-free and dairy-free, removing two big allergens that people have problems with nowadays. And rather than traditional white potatoes making up the mashed topping, I've switched them out for sweet potatoes.
Sweet potatoes are a fantastic starch choice, full of
A lot of people wonder, what's the difference between cottage pie and shepherd's pie? With shepherd's pie, the meat involved in the recipe is typically made with ground lamb or mutton. Cottage pie, however, uses ground beef. So, this recipe could be considered a version of either of these -- but with a healthier, more nutrient-dense twist!
See below for the full details!
Happy eating!